• Home
  • About
  • SHOP
    • Oils
    • Amazon
    • Free People
    • Rugs USA
  • Recipes


        • Recipe

        • Appetizers
        • Main Dish
        • Salads
        • Sides
        • Desserts
        • Drinks + Smoothies
        • Recent Posts

          • Best Books to Read (Depending on Your Mood) Pt. 2

            Best Books to Read (Depending on Your Mood) Pt. 2

            October 29, 2024
        • Recent Posts

          • Grandma’s Authentic Tomatillo Salsa Recipe

            Grandma’s Authentic Tomatillo Salsa Recipe

  • Wellness


        • Wellness

        • beauty
        • self care
        • kiddos
        • essential oils
          • DIY Aromatherapy Bath Salts

            DIY Aromatherapy Bath Salts

          • Bloomer Crew Dinner Party

            Bloomer Crew Dinner Party

  • Life


        • Life

        • love
        • grow
        • learn
        • live
        • lake arrowhead
        • Favorites

          • The Weekly Report: Volume 1

            The Weekly Report: Volume 1


          • Our Love Story: Part 13

            Our Love Story: Part 13

  • Make


        • Make

        • celebrate
        • craft
        • nest
        • style
          • Jack-O’-Lantern Stuffed Peppers

            Jack-O’-Lantern Stuffed Peppers

          • Foraging Fresh Flowers + Greens

            Foraging Fresh Flowers + Greens

  • Contact

Little Miss Momma

craft

Dollar Store DIY Boys Room Wall Art

September 9, 2011

I’m in the middle of giving Lil W’s room a bit of a “big boy” makeover.  Aside from his red race car bed, we still have all of his light blue and brown nursery decor in the room–and it just looks mismatched.  And considering he is obsessed with all things related to cars and trucks, we’ll be going in this direction for our theme.

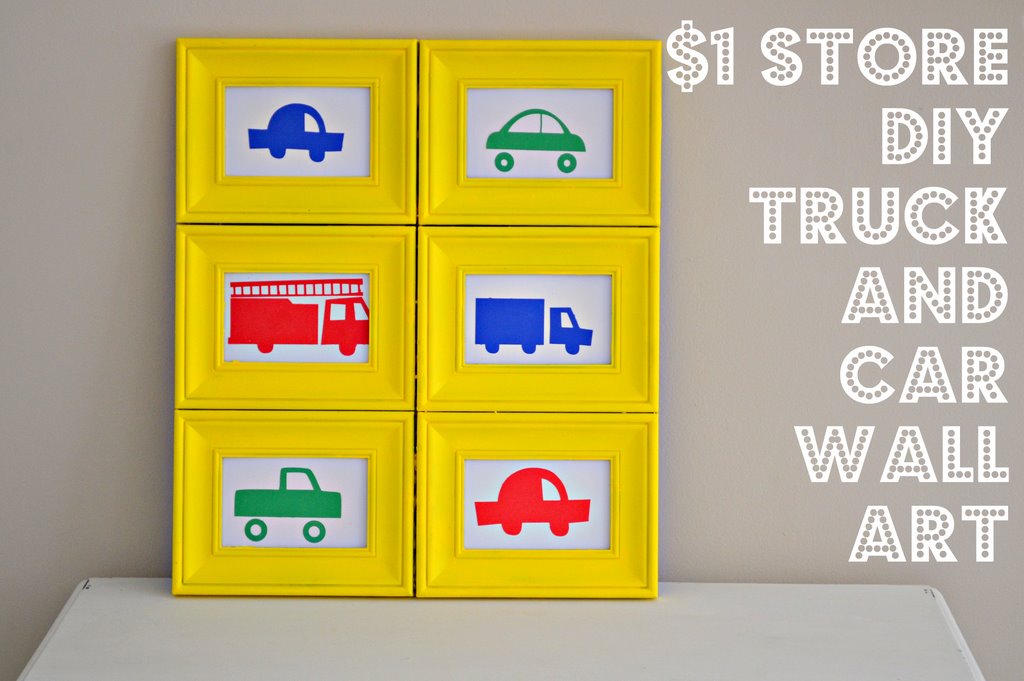
I made this wall art using frames from the Dollar Tree.  It was super easy.

Supplies:
6 4×6 plastic frames from the Dollar Tree
Spray paint
Hot glue gun (and E 600 glue)
3 sheets of colored card stock
3 sheets of white card stock
glue stick

First I removed the backing and glass from the frames. Then glue them together using hot glue. The backside will look pretty messy, but the front will be perfect.

Then I spray painted the front. I found out that in some places the plastic frames didn’t take to the spray paint that well. So I touched up the frames with acrylic paint.

While the frame was drying I used my Silhouette to cut out these cute truck shapes. Then I glued them down on six pieces of 4×6 white cardstock.

Then I put them in the frames. I left out the glass just so that it would be a little safer in Lil W’s room.

IN HINDSIGHT: The hot glue is probably not the best to use, because over time the frames will fall apart. Once the hot glue dried, I actually went over the whole frame with E 6000 glue.  Also, I think the project would be easier with wood frames–I just couldn’t pass up these cute ones for only a $1.

TAGS:silhouette
Share
Ashley Stock

I'm Ashley. Sometimes I craft, occasionally I cook, everyday I write, and I'm always Momma. This is my blog. I keep it real while still seeing the rainbows and butterflies in all of life's lessons.

You May Also Like

11 Tutorials I Love, and you will too

May 9, 2010

Victorian Lace and Pearl Headband TUTORIAL {on headband week}

August 30, 2010

Button Bracelet Tutorial

April 20, 2010
Previous Post
French Fry
Next Post
Pick Me Up
About Me

About Me

I'm Ashley. Sometimes blogger. Everyday oiler. Cozy homemaker. Milestones. Meltdowns. Life lessons of a momma-in-training.

Join the mailing list

Be the first to know about new posts + all the best deals!


Thank you for subscribing!


Wellness

Life

Make

Lake Arrowhead

Recent Posts

  • Best Books to Read (Depending on Your Mood) Pt. 2

    October 29, 2024
  • I almost cancelled this photoshoot…

    October 13, 2024
  • Favorite Fall Recipes

    October 7, 2024

Shop My Favorites

Follow Along With Me

…
  • Home
  • Wellness
  • Life
  • Make
  • About
  • Contact
  • Amazon
  • SHOP

Copyright 2020 Little Miss Momma Site Powered by Pix & Hue.