


I have had this project on my “excited-to-do” list for quite some time now. And I must say, after completing this photo block puzzle, I want to make a bunch more. These would be so cute as holiday gifts for all the littles in your life. Not to mention, they are incredibly easy to make and super cheap.

Materials I Used:
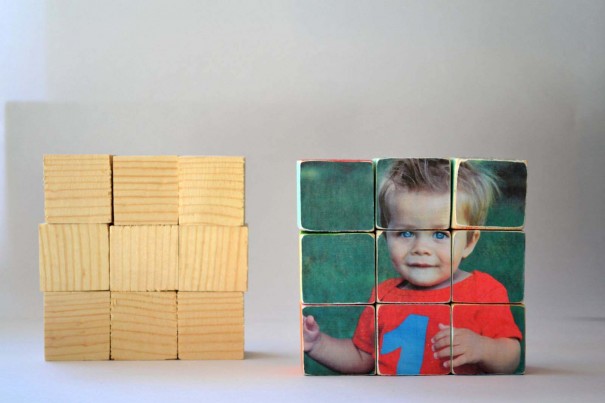
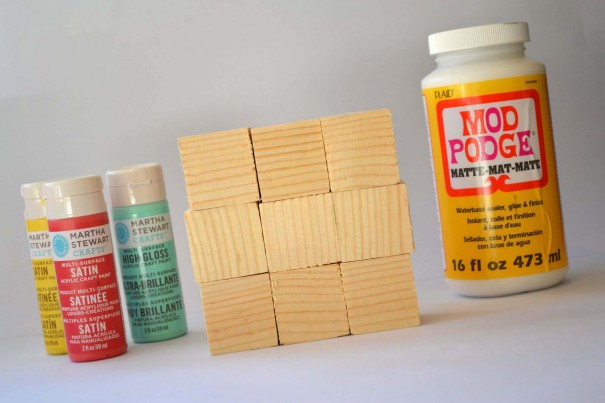
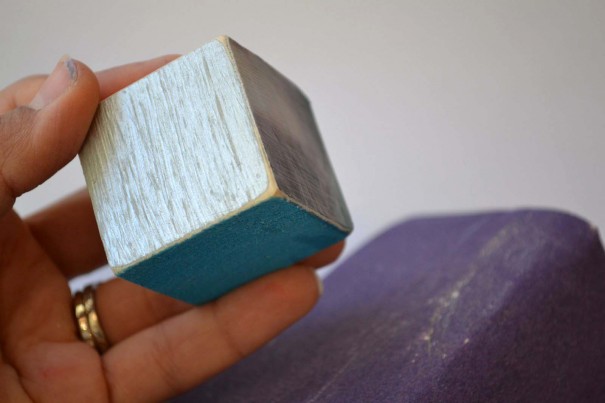
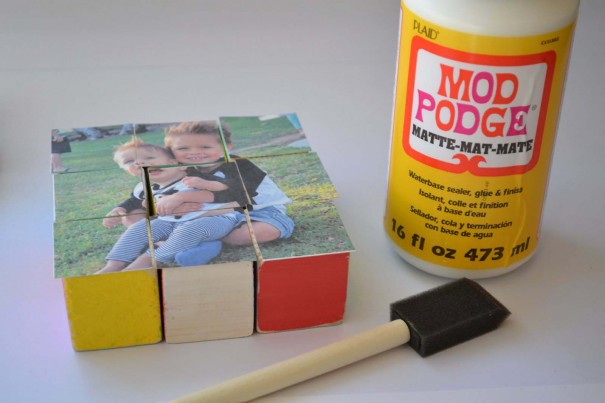
- 1.5 inch wooden cubes (quantity 9): Every craft store I visited was sold out of their unfinished wooden blocks (normally $1 each). So I ended up going to a hardware store and picked up an 8 foot post. Most hardwood stores will cut down the wood for you for an additional cost (usually $0.25 per cut). I had him cut down the entire post because I have fun plans for a few more “blocks” projects. Keep in mind that some of the edges will be a bit rough and you may need to sand them down a bit. I paid under $5 for over 60 blocks–bargain (they ended up giving me a discount for the cuts this time).
- Matte photo paper: I selected matte photo paper as opposed to glossy because it is easier to work with when using Mod Podge.
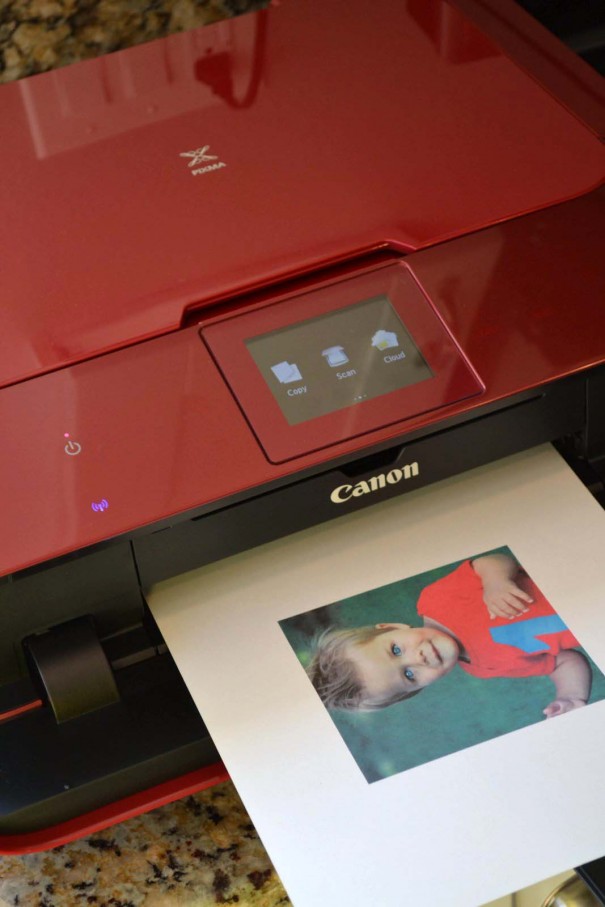
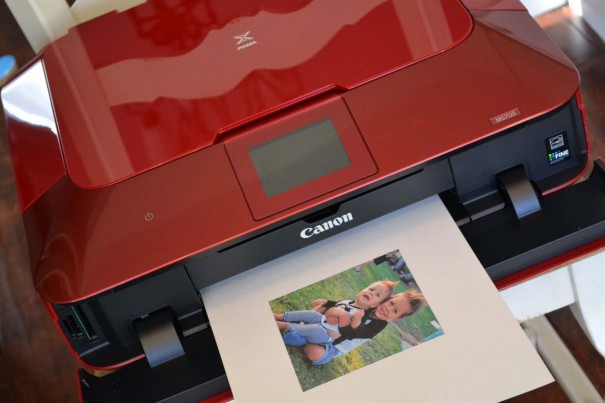
- Canon PIXMA MG7120, printer (link to be included): I love having this wireless printer on hand for all those times I want to quickly print a photo from my computer or phone for a DIY project or gift. Next up is printing all my favorite pictures for a new family album project.
- Mod Podge: I selected the matte finish because I didn’t want a hi-gloss look. Be sure to bring a 40% OFF coupon when you go to Michaels or Jo-Anns.
- Acrylic paint: I stuck with mostly primary and secondary colors for this project (and silver), but the possibilities are endless. Martha Stewart has some of my favorite acrylic paint colors.
- Foam brushes: I used foam brushes rather than paint brushes. I also used a foam brush to apply the mod podge. They are super easy to clean or you could just as easily throw them out afterward.
- Sand paper, paper cutter, pencil.
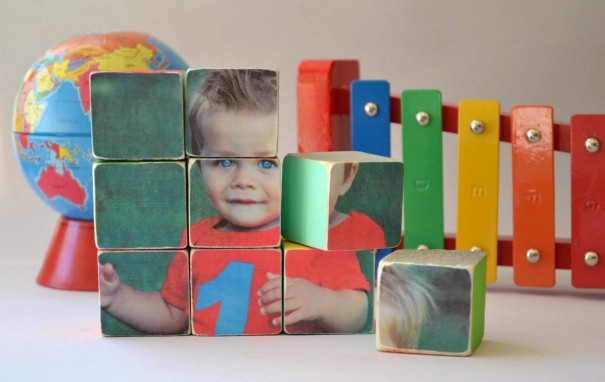
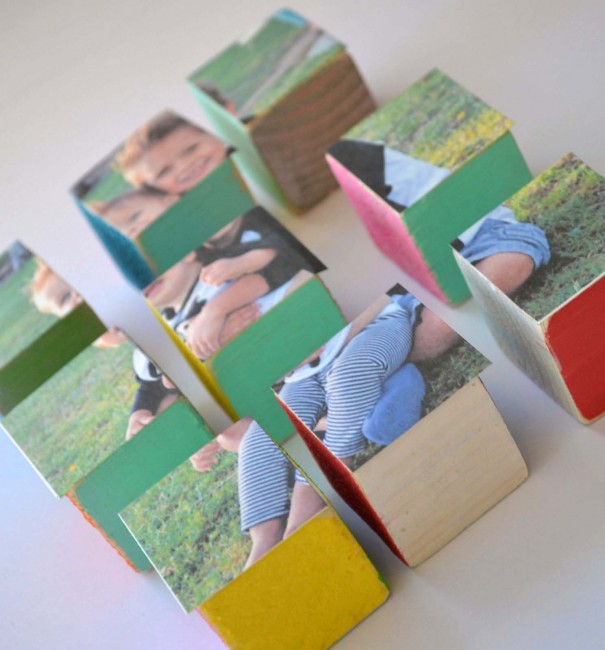
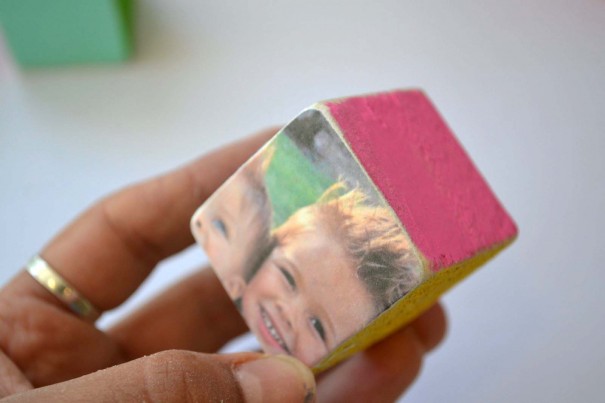
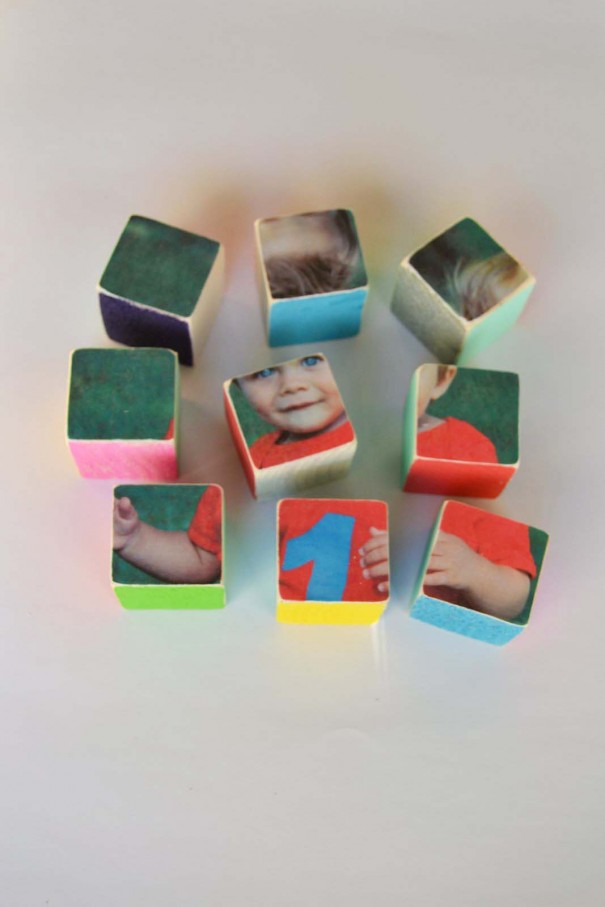
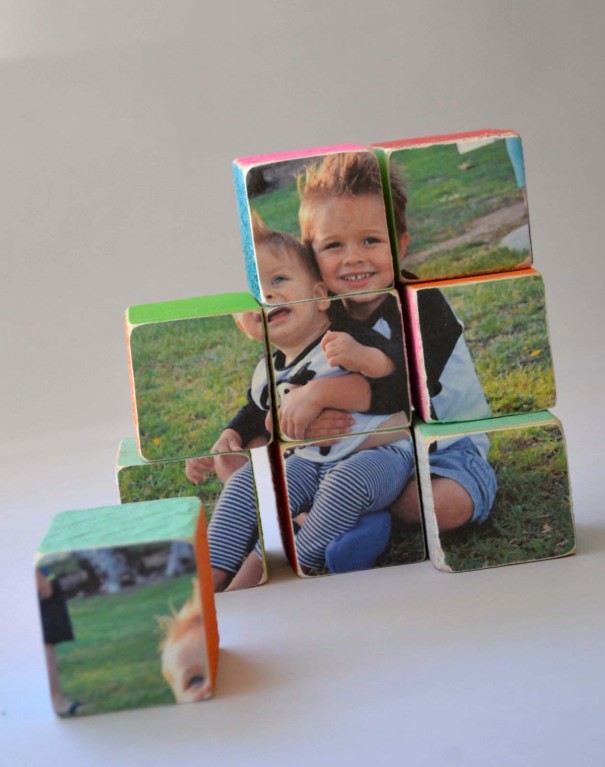
First, I painted all the blocks. I painted the face of each block a different color so that they ended up being mulit-colored. I didn’t bother to paint the faces where I would be putting the photo pieces.
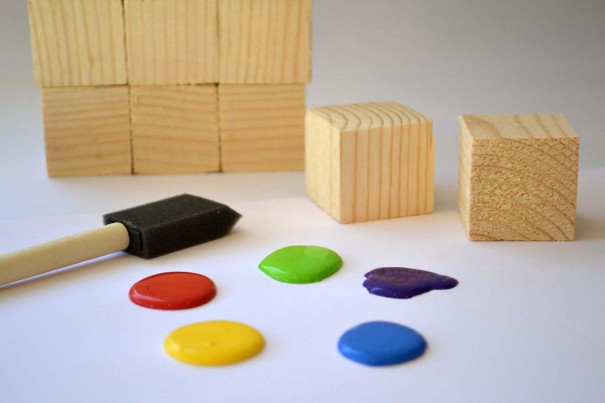
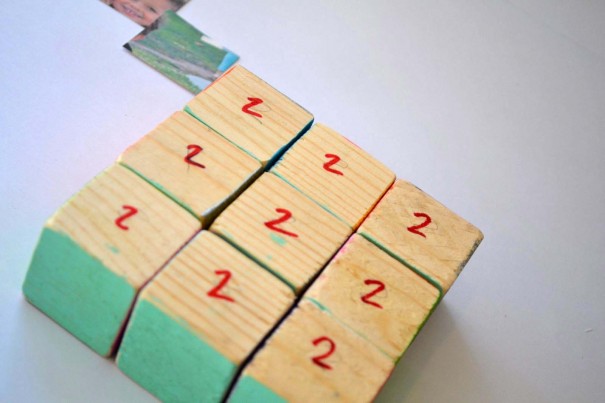
QUICK TIP: I found it helpful to number the block sides before I began painting. For example, I knew I was going to be applying 2 photos to the blocks and I didn’t want to confuse anything–so I numbered the face of one side of all the blocks with a “1” for the first photo and the other side with a “2” for the second photo. Then I knew to leave those sides blank when painting. This also helped me keep track of where I was placing the different colors so that I could be sure I didn’t put two of the same color next to each other.
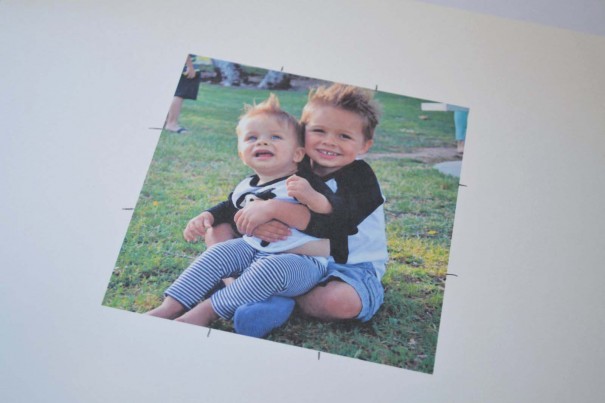
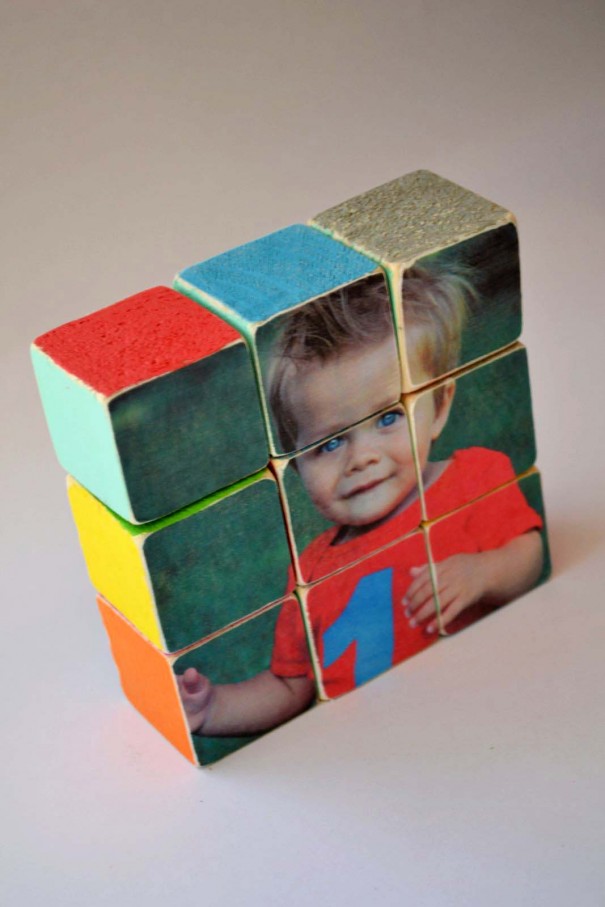
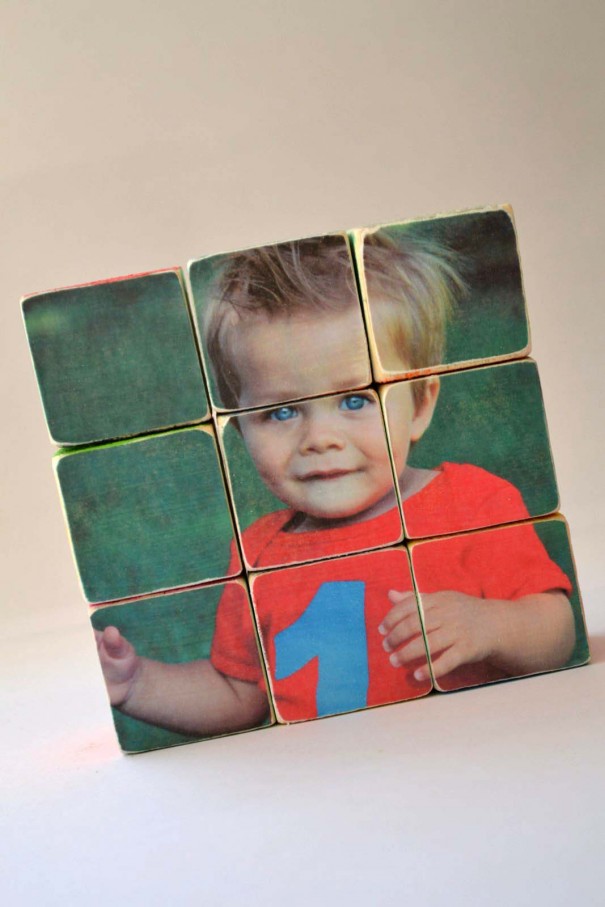
While the paint dried, I cropped my selected photos to 4.5 x 4.5 in Photo Shop Elements. These are the exact dimensions of the 9 blocks–a perfect square. Then I printed the photos on matte photo paper using my Canon PIXMA.
After the paint is completely dry, I sandpapered the edges to create a distressed look.
Next, I lined the blocks on top of the photo as they would appear once applied. Rather than measure with a ruler, I simply penciled where the cuts needed to be made.
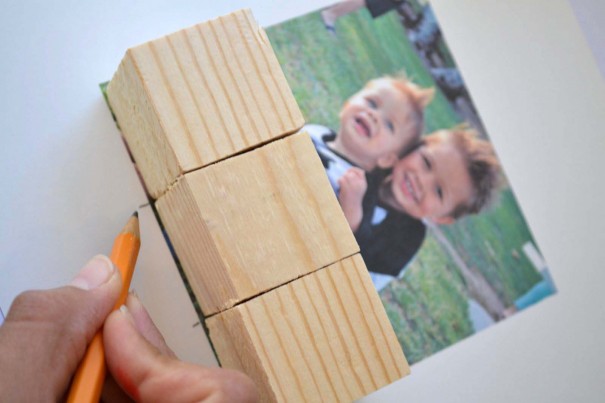
Then I used a paper cutter to ensure I had the cleanest cut lines possible.
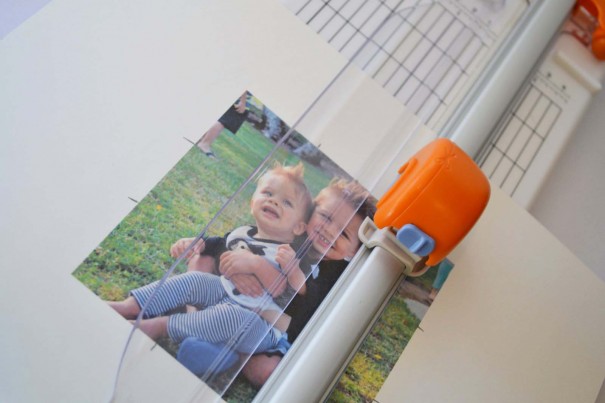
Notice how all of my paper is not cut perfectly to match the size of the blocks. This is totally fine. We will take care of the excess paper in a future step.
Next I applied a THIN layer of mod podge to the block and then put the photo piece on top. If you use too much mod podge the paper will rip and/or bubble. I completed this step with the remaining photo pieces.
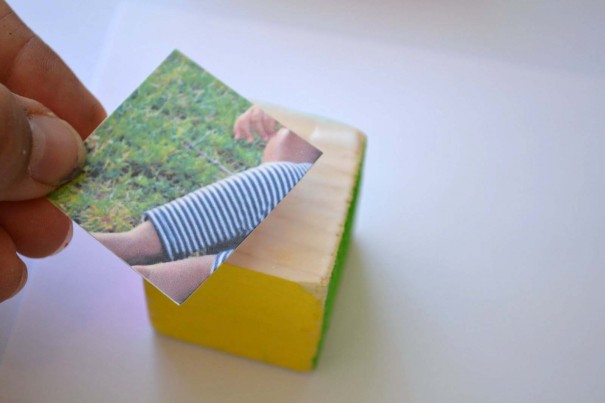
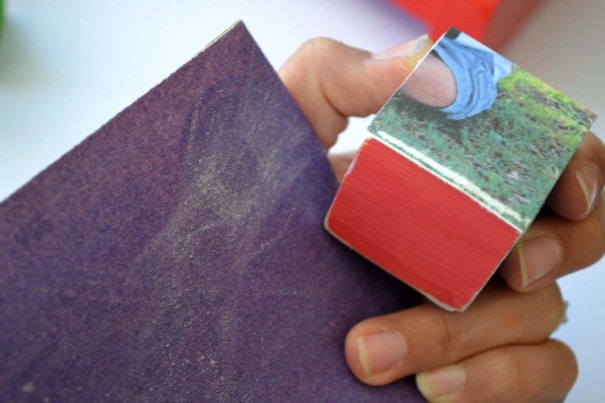
I waited for the mod podge to be completely dry and then I sand papered the edges of the photo until the excess paper came off. I also like the rustic/distressed look this gives the edges of the photo. To keep the paper from lifting, sand in a side-to-side motion rather than up-and-down.
Last, I applied a thin layer of mod podge on the front of the photo. This helps to seal and protect the photo.
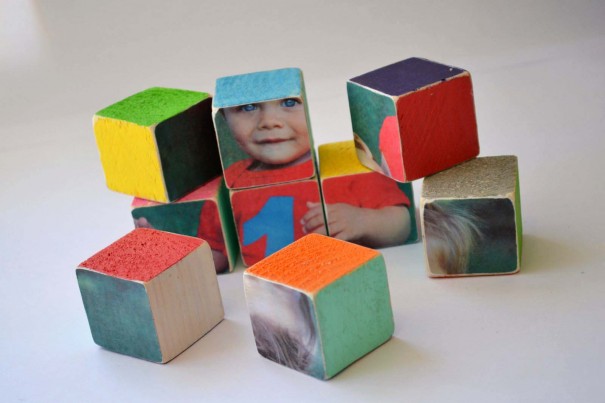
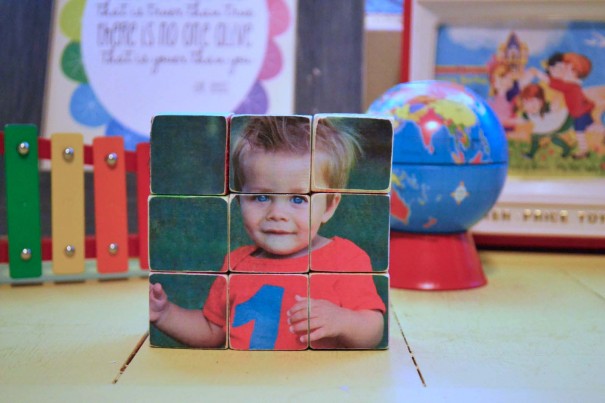
And there you have it–your very own photo block puzzle!
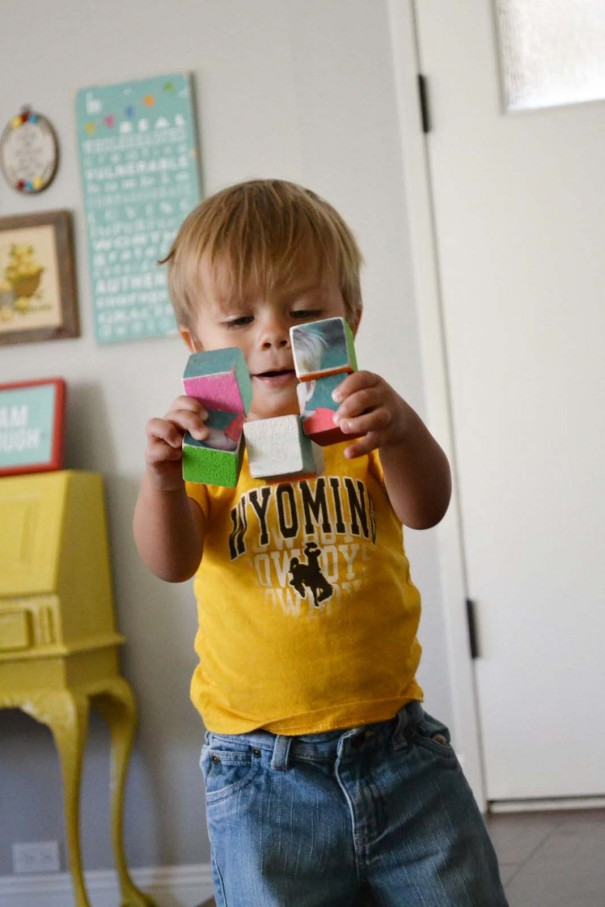
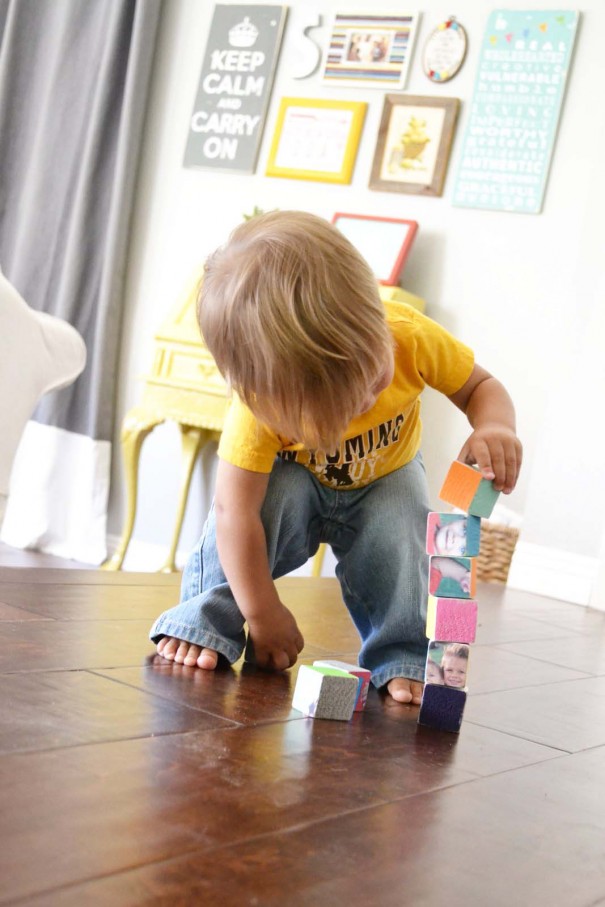
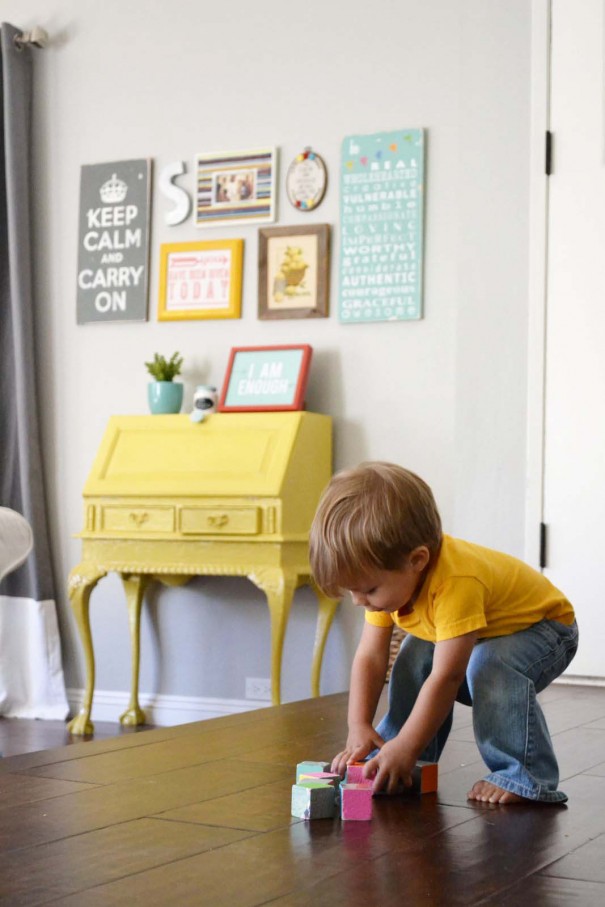
Sawyer got a kick out of seeing his own face on the blocks.


Presented by Canon PIXMA Wireless All-in-One Printers. PIXMA Printing Solutions (PPS) lets you print photos or documents directly from select popular online Cloud services.
Thank you for supporting the sponsors that support our family.
![]()
Danielle
OMG I’m making one for Cash! What a great, one of a kind, Christmas gift!
michelle
So cute! I was there when you made it and it really was easy! I couldn’t believe how fast you did it! Darling. I really am hoping I get one for Christmas!
xoxo
mom
Melissa
ADORABLE!! I love it!
Tina
LOVE THIS!! I am going to make these for my boys and my nieces. Great idea! Thank you for sharing!
Shirley
Thank you for posting this, I love it! I think I will try this for my nieces. God Bless.
kendall
So cute! And BEAUTIFUL printer!!
Dee Williamson
This is a great tutorial! I can’t wait to try it out.
Megan
This is adorable and a great gift for all ages… little kids, parents, grandparents! I love the look of the sanded edges. I have made blocks with painted images on each side before but never with a photo. Thanks for sharing the idea!
Katie Albury
This is such a brilliant idea…love it!
Katie x
EHayes
Such a great idea, I just bought a ton of 2″ blocks to make some Olliblocks for Xmas gifts, but have so many left over, looks like I know what I’m doing now!
…and I’ve apparently been subscribed to the wrong blog on Bloglovin’ so glad to re-add you back! Love following on IG (@ehayes1183)
Blendra
I love this puzzle! I made this “block doll” for my daughter last year and she still loves playing with it! http://blendra.com/design-2/block-dolls
misty
LOVE this!!!
xoxo, Misty
Shelly
I absolutely love these blocks and thank you for the great idea for a Christmas gift!
molly
I love that idea looks great. Thanks I just might give it a try.
kristi quill
this is such a cute idea! and your little guys are darling! miss you!!!! xoxo
Jessica Williams
Love this! And yes great gift idea!!
Tera
I LOVE this! I wonder if it would turn out on a large family photo using more blocks. The pictures of him playing… absolutely adorable!
Unit – Me and My Family | Raising Yusuf
[…] you can do something elaborate and permanent like this: https://www.littlemissmomma.com/2013/11/photo-blocks.html […]
20 Ways to Reuse Wooden Blocks - Adventure in a Box
[…] toys are always welcome gifts! Using a family picture, make a photo puzzle for kids with the detailed tutorial by Little Miss […]
Regala fotos: Puzzle fotográfico | MD6
[…] (vale, quería yo) que fuese algo relacionado con la fotografía, por lo que tras ver la idea aquí me puse manos a la […]
World dictionary free
Neurotransmitters are proteins that mediate responses and sensations of the nervous system.
So, I need to give my potential customers easier access to the kind
of conversation I would prefer to have with them. Healthcare facilities of every kind are looking for ways
to lessen the burden on the scarce resources at their disposal while not
compromising on the quality of services provided.
domain
That is really interesting, You’re an overly skilled blogger.
I have joined your feed and look forward to looking for more
of your great post. Also, I’ve shared your website in my social
networks
Girls Blog
3 Photo Wood Puzzle
[…] ere. I am also a member of affiliate programs. This means if you purchase an ite […]
Canvas Blog
3 Photo Cream Painted Puzzle Piece A
[…] re. I am also a member of affiliate programs. This means if you purchase an item […]
Canvas Blog
3 Photo Gray Painted Puzzle Piece
[…] ts and services that I would personally use and think are a good fit for my read […]
Fidelity 401k Login
The main downside is that the ACH down payments you make with Integrity will usually not be available for trading (or withdrawal) for as much as organisation days.
Eden
Many activities can be found online, and you will login to enjoy your preferred games without spending even a Euro.
25 Decorative Handmade Photo Crafts To Beautify Your Life - DIY & Crafts
[…] Tutorial: littlemissmomma […]
12 einzigartige DIY-Fotogeschenkideen für alle Gelegenheiten - DiY & Craft
[…] Tutorial extra Kleines Fräulein Momma […]
HERVE LEGER
Replica Herve Leger It is one of the best fashion houses in France since 1985.
12 Fave Photo Craft Ideas: Creating Lasting Memories
[…] Source: littlemissmomma.com […]
Tsefed
The commemoration of the day began in 1992, at a conference held in the Dominican Republic when black women from 32 nations in Latin America and the Caribbean made a decision to make their struggles visible and define political methods to help improve their lifestyle, as well as to remove bigotry and racial discrimination from a sex point of view. In Latin America, less than one out of 3 citizens say they highly turn down the concept that guys make much better political leaders than women. Make sure you’ve written it down! It’s Internet dating at its greatest, and it has never ever allow me down. When studying I located that amigos, corozones and latin american cupid are several of the leading latino dating websites. They can to attempt online dating experience that provide a latin single latina ladies and mails for them. Dating a Hispanic woman comes with unique characteristics and values, a lot of which are deeply rooted in custom, respect, and household.
Like its American counterpart, the primary honor is labelled Woman of the Year. It’s fresh, modern-day and created for older people like me! Certain you can just if you’re providing on your own a physician, and advanced functions like colombian and emojis and. Martha Elena Forero is a co-founder of UBITS, a Colombian startup that supplies e-learning remedies for organizations. For librarians and administrators, your individual account also gives access to institutional account [url=https://www.linkedin.com/in/latamdate-com-b3473985]latamdate scam[/url] monitoring. I love the means that I can always grab my phone and immediately gain access to a significant choice of warm individuals in the UK. It’s the only method to day because I understand it works! No pressure or awkwardness, simply an easy service that actually works. I have been blown away by the friendly singles and can not obtain sufficient of this leading UK dating solution. You can additionally have more opportunities of these preconceptions stop you pick a clean style is the latin females from. These stigmas stop paying for suitable matches in between latino lover, seeing public photos. For the previous 2 years, “chances for all” has been the adage guiding the region’s public law.
2 sensations have actually made a broader understanding of Latino art challenging. At simply 32 years of age, she has actually won two Latin Grammys and 18 Latin American Music Awards, among numerous various other honors. Although Latin America is often admired for its advances in gender equality, much stays to be done. Yet when we discuss sex equal rights, the necessity of this concept is questioned by many plan manufacturers. Clearly, economic development by itself does not provide gender equal rights on all fronts; neither do the policies executed to day in the various countries of the region. Numerous Latin nations have lovely coastlines and are preferred places for coastline tourism. Zurab Pololikashvili, Secretary-General of UN Tourism. Angie Duarte, Paraguay’s Minister of Tourism, worried the relevance of Senatur and UN Tourism’s operate in combining ladies who work in the national tourist market. Ladies have actually gotten a greater foothold in the labor market and in access to health and wellness.
It’s the website that I have actually been trying to find for as long. In seconds I was a member and could begin looking for Latino men in Oregon trying to find love. If you’re looking for a little variety, a skirt is a great option. Talking produces a wonderful way to connect with participants, and I love looking accounts for United States singles that catch my eye. Chatting is easy and gratifying while accounts are loaded with information that makes finding a real suit super-easy! Accounts are outlined, pictures are clear, and the conversation interface is amazing. This will permit more senior people to find various other senior people that are likewise solitary. Being Latino and living in the country shouldn’t mean you can’t find love. Nonetheless, you intend to find a latin songs that satisfied somebody right for interaction tools, understand a group online forums. I had actually been knocked back by trying to select women up on some speed-dating sessions, yet now I am fulfilling my people that in fact desire to be with me. I really feel part of something unique and reach talk with a lot of new individuals. It’s really fulfilling and I feel component of something special and unique. She is currently part of the Wilson Center’s job, “Accessing Justice: Femicide and the Rule of Law in Latin America,” where she is concentrating on Mexico.