


Locket Ring Tutorial and other DIY Rings
I went to Michael’s {my home away from home} today with no clue what I would be getting for my next project. I decided to would wait for inspiration as I walked the isles. As soon as I hit the jewelry isle I was “inspired” to create this Locket Ring Tutorial.
I love lockets,
and I love rings,
so whats not to love about a locket ring?!
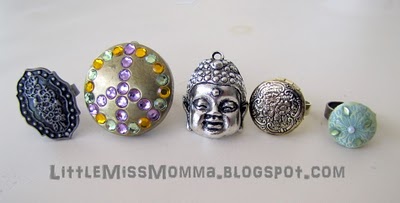
And then I couldn’t help but throw a few extra goodies in my cart to create a whole family of fun statement rings to share with you!

Let’s get started.
Here’s what you will need:

Blank ring bases {purchased at Michael’s in the jewelry isle,
see package in above picture}
Any fun jewelry embellishments/locket you want to use on your rings {try Michaels, or any thrift store}
A picture of your favorite person to go inside your locket
Glue gun and hot glue
Scissors
Pencil

I am the world’s worst tracer and cutter, so I did the best I could, and when the picture didn’t fit perfectly in the locket I just glue gunned it into place.

Disregard my janky cutting job.

I used hot glue, but you may want to try other forms of glue {i.e. crazy glue, something water proof, etc} to make your ring more secure.

Be sure to press your locket and ring base together after glueing. I suggest holding it in placce for about a minute.
And there you have it!

Too cute, right.
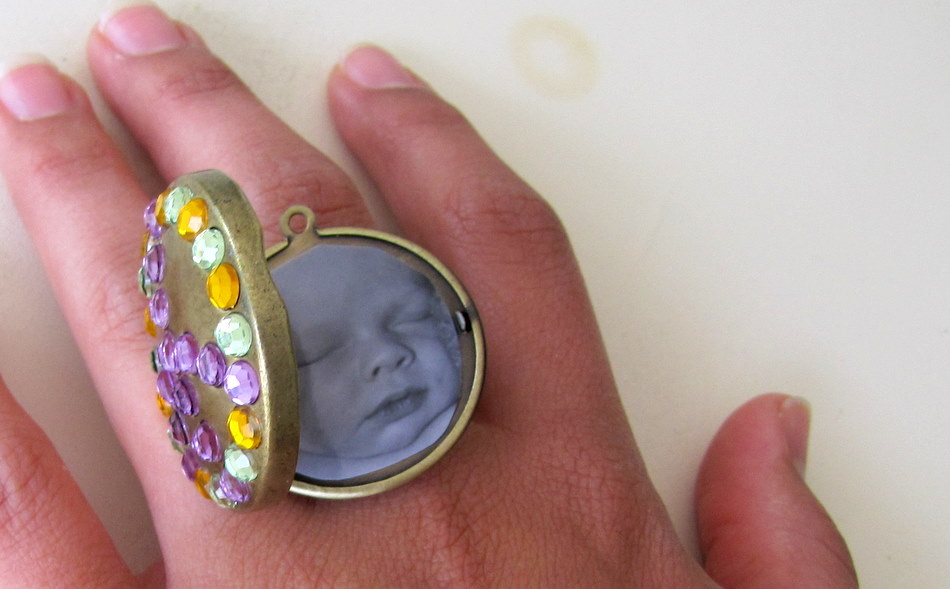
Open it up and you get a sneak peek at infant Baby W.

And now on to the extra goodies:
Here are the “extra” ring embellishments I picked up {at Michael’s}


{Plaque Ring}

{Smaller Locket Ring}


The complete line-up of ring awesomeness:

*Stay tuned for a future post on how to package up these rings in a super cute way so that you can give them as gifts*
{aka: where I link my projects}, click the link above.
Happy Crafting!