


How to Create and Photograph a Blog Tutorial
{even if you’re not a photographer}
{and especially if you don’t own photo shop}
A few of you have sent me emails wondering if there are any secrets to the photos I take for my to tutorials. Are you ready for the truth?
Here it goes.
I have NO IDEA how to use my camera.
I don’t even know what kind of camera I own{sure I could walk over and pull it out of the closet to see what its called, but I’m all cozy on the couch right now, and for the purpose of this tutorial it doesn’t matter}.
I literally just point and shoot on “auto”.
And since I have no idea how to use my {or any} camera, I need to compensate in other ways. Here are my not so secret secrets to creating a pretty tutorial with decent photos:
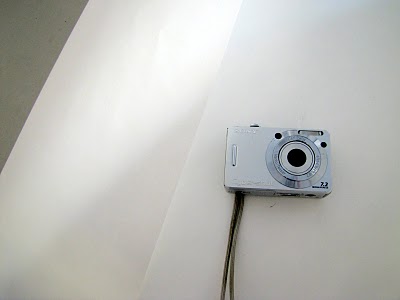
First, all you need is a camera {this is not the camera I use} and a large white poster board.

Now place all your tutorial supplies on the poster board in a pretty layout like this:

Isn’t that so pretty?!
Don’t be fooled though–this picture is the miracle of the poster board.
The poster board gives the illusion of a photo box or studio.
Zoom out and now you can see the disaster that is my garage–where this tutorial really took place:

Ahhh, not quite as pretty.
In order to make sure you can’t see my vacuum and 15 loads of laundry in the background, I use the hand not holding the camera to fold up the poster board as a backdrop for the photo.

Then I stand really really close to the object to take my picture. For some reason I like this better than zooming with my camera.
And here is how the unedited picture turned out.
Not half bad.
But still not all it could be.

This is where “editing for dummies” {aka editing for me) comes into play. If you haven’t already, head over to Picasa and download it immediately.
It’s free, it’s easy and it’s awesome!
Picasaprovides BASIC editing tools for your photos–not to mention it is owned by google, so as soon as you finish your editing you can automatically upload your pics to blogger with the click of a button–super convenient!
Picasa is also where I insert my cool fonts into photos.
Once you have downloaded Picasa and have selected the picture you wish to edit click on the button titled “I’m feeling lucky” and Picasa will automatically edit your photo for you–it’s true!
note: sometimes Picasa doesn’t edit a photo exactly how I want so I tweak the “highlight” and the “fill light” settings until I get the end result I am looking for. This will make more sense when you are in the program.
Photo BEFORE Picasa:
Same photo AFTER simple editing in Picasa:
BIG Difference!
And now for some more random tips:
I like to really crop my pictures so that they are zoomed in on the subject of the photo. For example, I needed to crop my thumb out of this picture and brighten it up with the “fill light” tool in Picasa.
Before:

After:

*I ALWAYS take my pictures during the day and INDOORS.
*I am sure to be in a VERY well-lit room, that is NATURALLY lit from outside.
*Make sure there is no outside glare or shadows in your photos.
*Early morning and late afternoon tend to be the best times to shoot at my house.
*I NEVER use artificial lighting–the pictures will just turn out yellow.
NOTE: I am NOT an expert and certainly NOT a photographer–so I know there are actual “professional” tips out there that are much better…but this is what works for me *smile*
{Hope this helps a few of you}
Ashley
I just love your blog. I keep blaming my camera for my terrible pictures so this post is exactly what I needed! Downloading Picasa now!!! 🙂 Thanks!
Shannon
Bless you for this post! The photography side of blogging has had me sweating, but I'm feeling much more confident after reading this. I'm off to find Picasa.
Lil Mama Stuart
ha! I seriously would've never known it was just a point and shoot. Good work!
Katie Evans Photography
Great ideas and something that everyone can do to improve their blog pictures! You have a natural eye for style!
Lindsay
Okay baby is in bed…now I can browse you cute blog 🙂 I was always wondering how bloggers took such perfect pictures with white backgrounds..I just thought everyone had white kitchen counters haha! Poster board..got it! Thank you so much for sharing.
Delighted Momma
JeanaMichelle
Finally!!!! a tutorial addressed specifically to a blogging idiot like me! (thank you Keren from "FreePrettyThingsforyou" for directing me here). I am so excited to give these tips a try.
Sadie
These are exactly the tips I needed to give my photos a boost! Thanks so much!
Sadie
How to Grow Your Etsy Online Business - Selling on Etsy - Little Miss Momma
[…] ups (you don’t want a buyer to think you have anything to hide). Please NO blurry images. This post also has some helpful tips on taking good product shots. Also, if you are on Etsy, be sure to use […]
Mahina
What program do you use to edit and enhance the picture once you are done taking them?
The Scoop on My Cameras - live - Little Miss Momma
[…] you that I have NO idea what I’m doing when it comes to photography–if you read this post, then you already know what I’m talking about. I take every picture on […]
192.168.l.l
Thank you for sharing the post! This helps me a lot.
majece majece
I recommend you to check https://besttrackingapps.com/flexispy-tracking-review/ out if you want to know more about Flexispy Tracker. It will help you for sure
USAC Nagpur
Such A nice post… thanks For Sharing !! Now you can Study MBBS In Abroad via http://www.usacoverseas.com/
JagrukBane
Visit the JagrukBane website, view customer reviews of packers and movers companies and then book their relocation services for your transfer.
HERVE LEGER
Herve Leger, Oktoberfest outfit people tend to wear our collections together, as one piece. But I like them as separates; it’s almost cooler,” she says. “I would put this jacket with a pair of jeans or a work skirt. And of course it all but if you’re in L.A.