


What can I say, I am a sucker for buttons!
{Hence, yet another button tutorial}
I think this one would have been cuter if I used buttons that were a bit more “fun” or colorful…
**Note: If you have a project and/or tutorial using buttons, please leave a link to it in the comments section to be considered for an upcoming
feature in my Button Round Up**
the Button Headband Tutorial:
Here’s what you’ll need for this project:
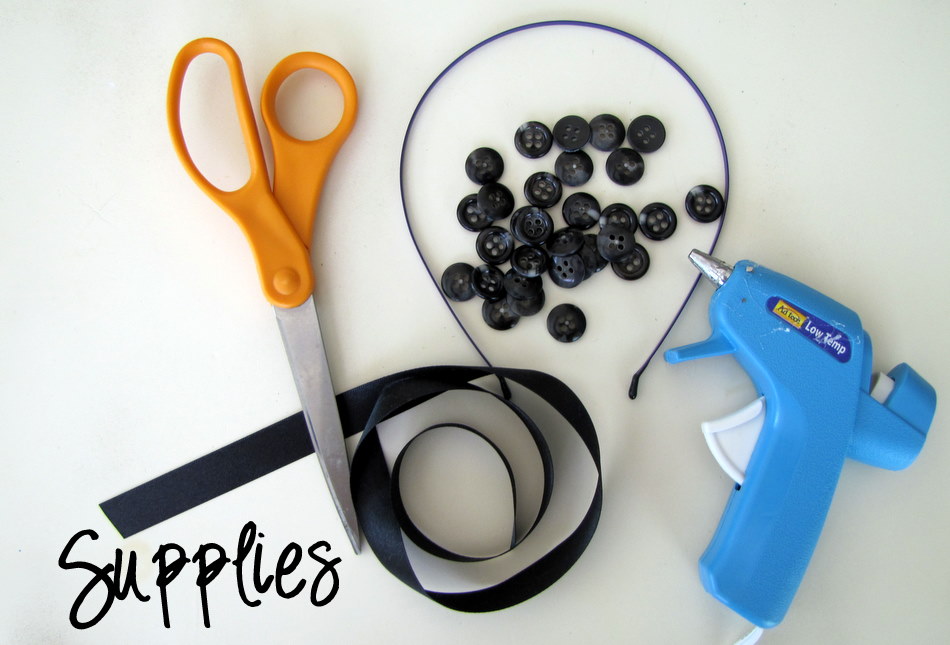
Supplies:
Headband {and plain headband @ Target}
Buttons of your choice
Glue gun and hot glue
Ribbon {similar color as buttons}
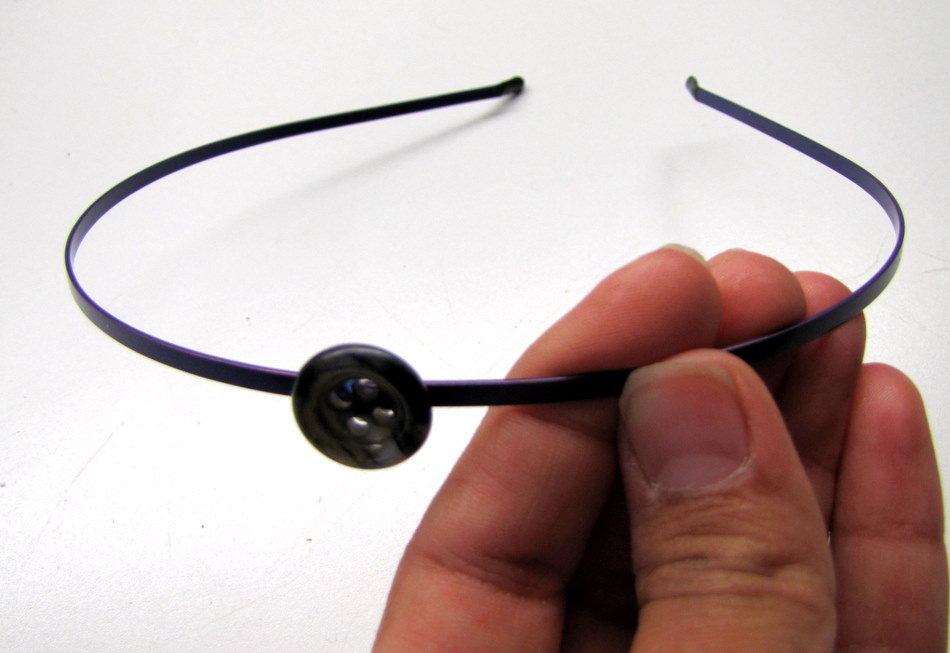
STEP ONE:
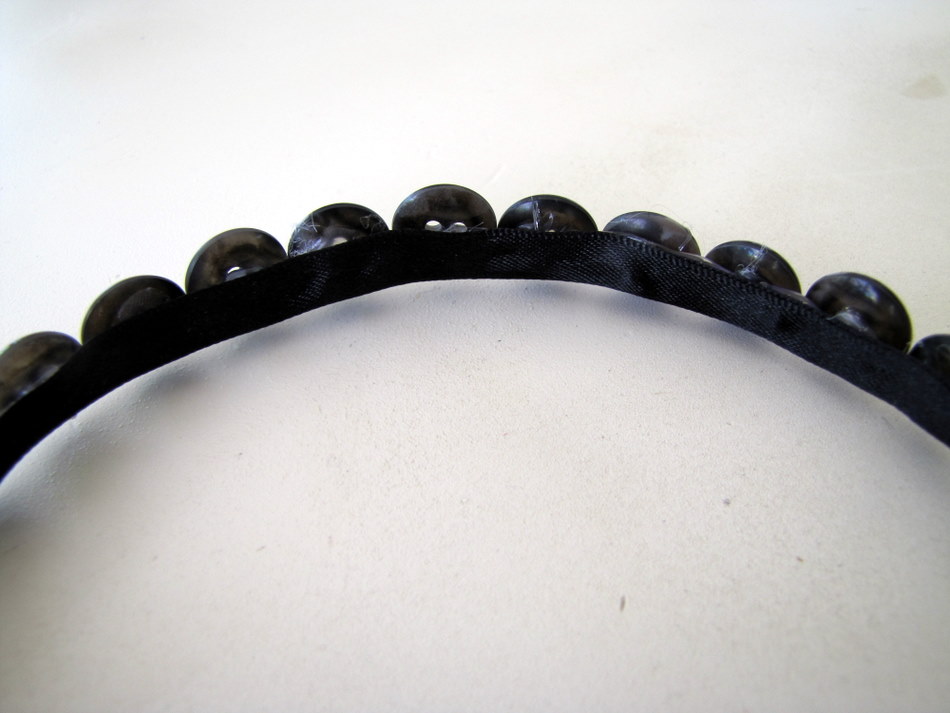
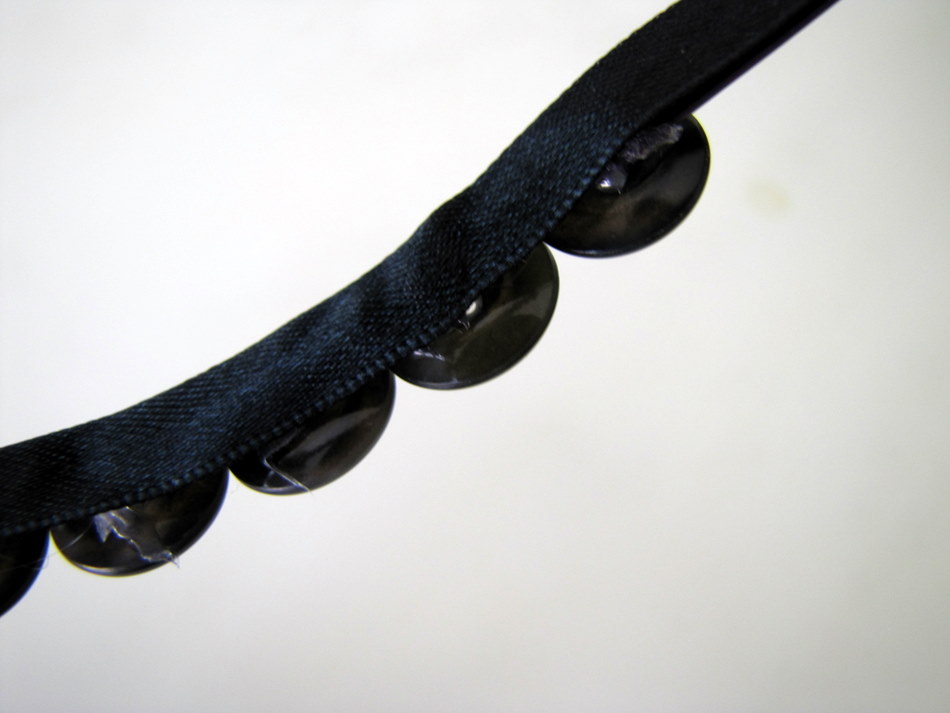
Glue down the first button in the center of your headband.
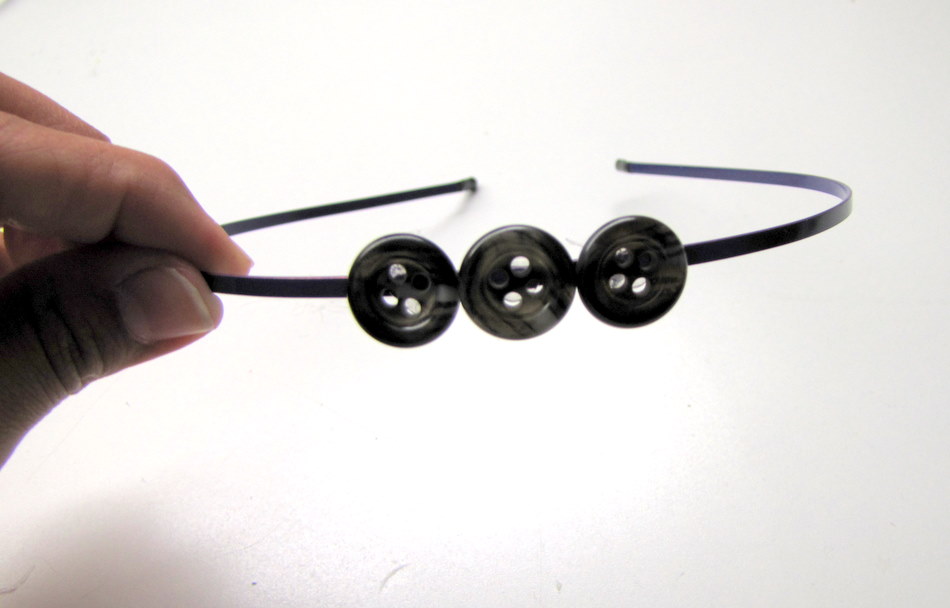
Working from the center button, continue gluing down your buttons.
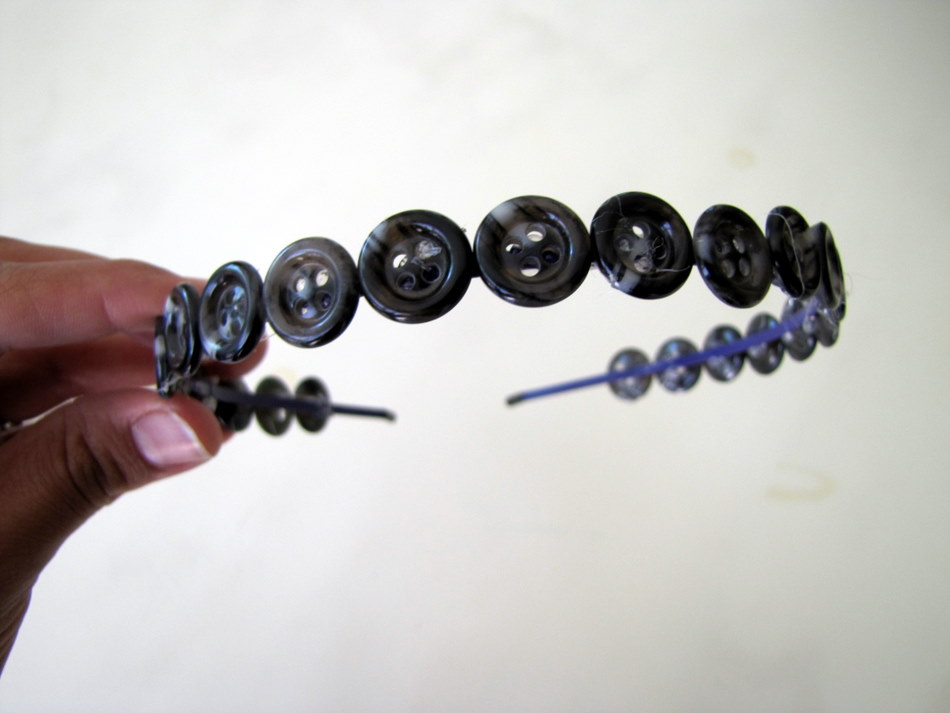
STEP TWO:
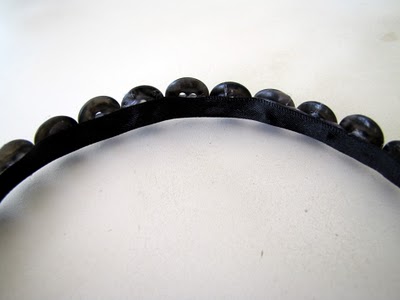
Now that have finished gluing down your buttons we need to add the ribbon to keep the buttons and glue from sticking to your hair. I suggest using a ribbon in a similar color as your buttons. Also, make sure your ribbon is not wider than your buttons {you don’t want the ribbon to show}.
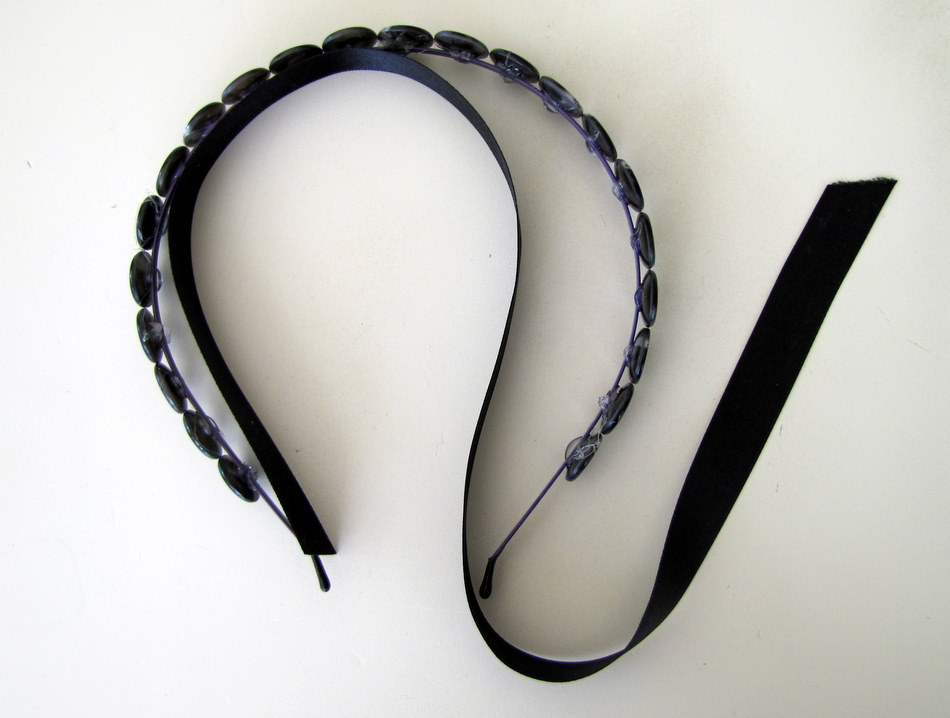
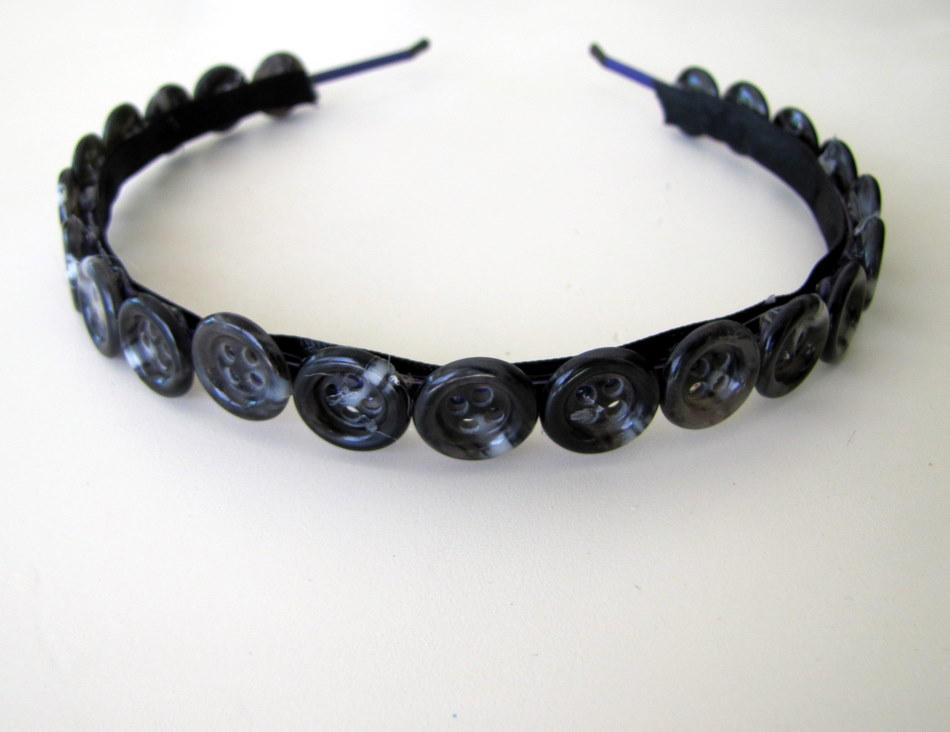
Trim the ends of your ribbon and then you are done!
This is what the underside of your headband should look like:
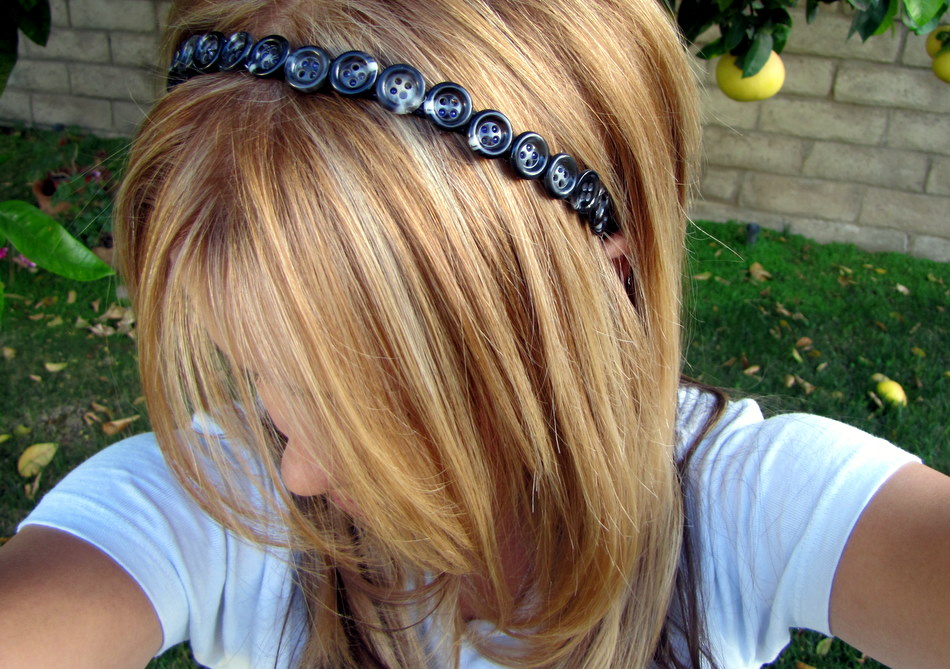
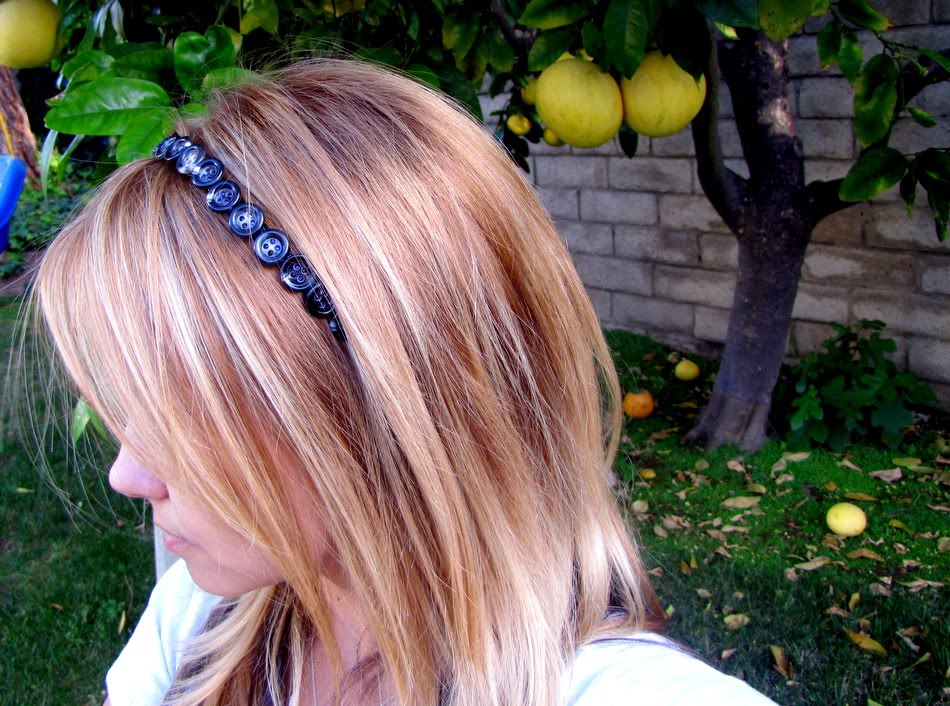
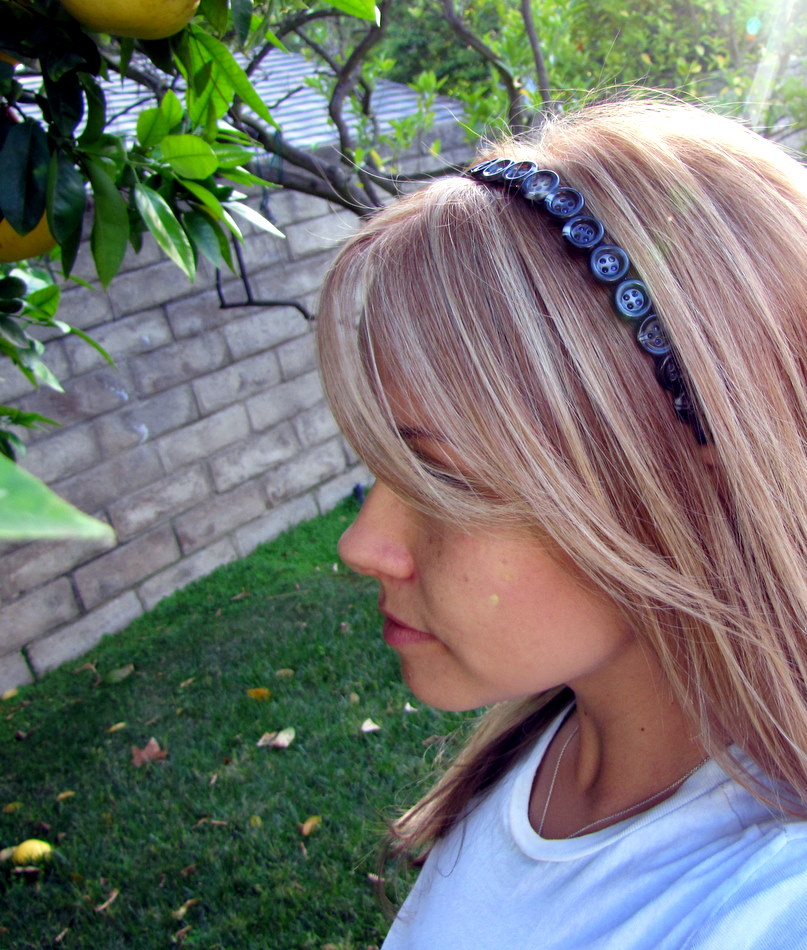
And here you have it:
My attempt at taking pictures of myself wearing my new “cute as a button” headband:
If you make a headband using this tutorial I would LOVE to see pictures of the final product!
ALSO, I will we doing an upcoming BUTTON ROUND UP, so if you have a project and/or tutorial using buttons, then leave your link in the comments section to be considered for a feature.
{Click HERE to check out the awesome blog parties I link to}
Happy Crafting!
Liz @ Sugarplum Creations
I love buttons too! That headband is super cute!! 🙂
Anonymous
So simple yet so clever. Brilliant idea. Thanks for sharing it as I know my daughters will love it too.
Louise
Stunning
Love it!
How cute – thanks for the tutorial!
~*Jess*~
So cute! I need to try this one. I love all the cute headbands but I'm always too cheap to buy them, for fear that I look like a dope and never wear them!
Love Stitched
ohhh i love this idea!! cute headband!
Michele {The Scrap Shoppe}
Really cute! I love it with the simple buttons. It makes it more everyday. I could see making another one with "special" buttons for a special occasion. Love the blog makeover, too!
Amanda @ Serenity Now
I love that headband. 🙂 Very simple but chic project…a grown-up or a little girl could wear it and look sweet. I have a link for a project I used buttons with. The buttons ended up making the project for me! 🙂
http://serenitynow4amanda.blogspot.com/2009/07/diy-ribbon-and-button-embellished-lamp.html
mywifesstudio
Thanks..I need a couple of these for myself!!
Anna
Love the headband! And it looks super easy to make too!
Bere
This is such a fantastic idea! The headband looks fabulous! I love headbands, so I
definitely want to give this tutorial a try. Thank you Ashley.
Your blog is so beautiful =)
polwig
Love it.. it is so cute and simple plus with all the buttons out there it can be so versitile
CINNIBONBON
Pretty cool. Aren't buttons just the best crafty tool?! Thanks for sharing.
Heather
LOVE it! TFS!
Andrea @ TheTrainToCrazy.com
This would look great with mismatched buttons as well. Such a cute idea! Thanks for sharing.
I have a weekly Thursday blog party especially for people to share things they've made to be worn. Stop by if you'd like! It is called Make It Wear It and I host it at TheTrainToCrazy.com
Kaysi
That is great!!! This is headband I would actually wear! Thanks for the idea!
Jessica
This is a super cute idea! I'm starting a feature on my blog–if you'd like to be featured, visit me at homeandholidaykeepsakes.blogspot.com
I'm a follower! Thanks!
nannykim/spindlecottage
This is so cute. I have never been able to wear headbands…they tend to hurt. But this is oh so cute.
http://spindlecottage.blogspot.com/
Beverly @ FlamingoToes.com
Oh this is very cute! I really like it – thanks for the tutorial!
Kari @ Ucreate
Simple, yet oh so cute!
I'll be sending my readers your way!
Steph
So adorable! Yet it still looks so elegant in all black.
I heart buttons too, especially covered buttons. I made this heart in an embroidery hoop recently (scroll down the post to find it). Thanks for the chance! http://sillypreciouspiggies.blogspot.com/2010/05/big-room-little-updates.html
Justine
This is super cute! It is definitely simple. I am going to try it after I collect some buttons 🙂
kirstin & jordan
Ooooh, LOVE this! Great blog, great tutorial…
We'll be featuring you tomorrow, so come on by and grab a button!
kirstin & jordan
Ooooh, LOVE this! Great blog, great tutorial…
We'll be featuring you tomorrow, so come on by and grab a button!
Cheap Louis Vuitton handbag
In 2002, iOffer revolutionized eCommerce by launching a transparent, negotiable marketplace.
Make handmade
Love it. Thanks for sharing
Düğmelerden Taç Yapımı | Hobi Fikirleri Yaratıcı El İşi Örnekleri
[…] Bayanlar ! kendimizin veya kız çocuklarımızın taç modellerinde yeniden küçük bir değişikliğe gitmeye ne dersiniz ? Hayalinizdeki gibi dilediğiniz renkli çiçekli, figürlü,düğmelerden ve ufak bir kumaş şeridinden tutkal ile taç modeline düğmeleri yapıştırmak isterseniz metal taç modelinin üzerini siyah düğmelerle yeniden şekillendirmişler. Nerede ? Burada yapmışlar. […]
ask.fm tracker
I wanted to write you one tiny observation in order to thank you as before with the beautiful guidelines you have shared here. It was certainly generous with you to deliver extensively all that some people would’ve made available for an electronic book to get some profit for themselves, certainly given that you might well have done it in case you decided. The advice additionally acted to provide a good way to know that some people have the same dream much like my own to find out a great deal more on the topic of this issue. I am sure there are some more fun sessions ahead for those who view your blog post.
Ask.Fm tracker
Ask.Fm tracker
Button Headband Tutorial – craft – Little Miss Momma
Harold
Hey! Have you seen this https://college-homework-help.org/blog/case-brief before?
HERVE LEGER
Herve Leger, Oktoberfest outfit people tend to wear our collections together, as one piece. But I like them as separates; it’s almost cooler,” she says. “I would put this jacket with a pair of jeans or a work skirt. And of course it all but if you’re in L.A.