• Home
  • About
  • SHOP
    • Oils
    • Amazon
    • Free People
    • Rugs USA
  • Recipes


        • Recipe

        • Appetizers
        • Main Dish
        • Salads
        • Sides
        • Desserts
        • Drinks + Smoothies
        • Recent Posts

          • Best Books to Read (Depending on Your Mood) Pt. 2

            Best Books to Read (Depending on Your Mood) Pt. 2

            October 29, 2024
        • Recent Posts

          • Grandma’s Authentic Tomatillo Salsa Recipe

            Grandma’s Authentic Tomatillo Salsa Recipe

  • Wellness


        • Wellness

        • beauty
        • self care
        • kiddos
        • essential oils
          • DIY Aromatherapy Bath Salts

            DIY Aromatherapy Bath Salts

          • Bloomer Crew Dinner Party

            Bloomer Crew Dinner Party

  • Life


        • Life

        • love
        • grow
        • learn
        • live
        • lake arrowhead
        • Favorites

          • The Weekly Report: Volume 1

            The Weekly Report: Volume 1


          • Our Love Story: Part 13

            Our Love Story: Part 13

  • Make


        • Make

        • celebrate
        • craft
        • nest
        • style
          • Jack-O’-Lantern Stuffed Peppers

            Jack-O’-Lantern Stuffed Peppers

          • Foraging Fresh Flowers + Greens

            Foraging Fresh Flowers + Greens

  • Contact

Little Miss Momma

craft

Paper Flower Spring Headband Tutorial

May 18, 2010
Are you ready for a mega-Springy and super easy paper flower headbands tutorial?
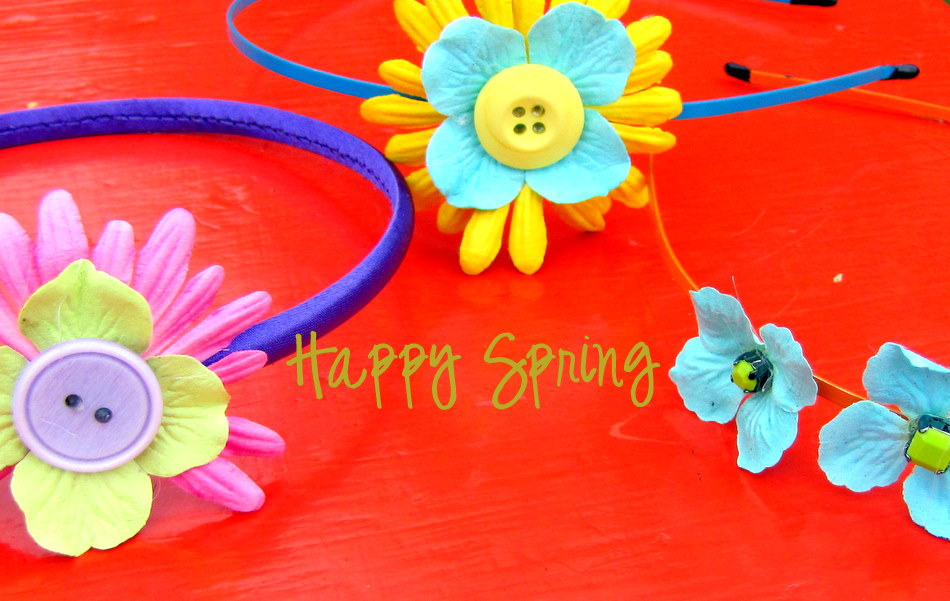
I realize these headbands are a bit BOLD, but they are great if you are feeling a bit brave in the fashion department this Spring–and they are perfect for little girls {because they can get away with wearing bright flowers in their hair no matter what}.
This is a great project to do with your girls over summer vacation–and you can buy everything for cheap at your local craft store.
{And now for the 5 minute  tutorial}
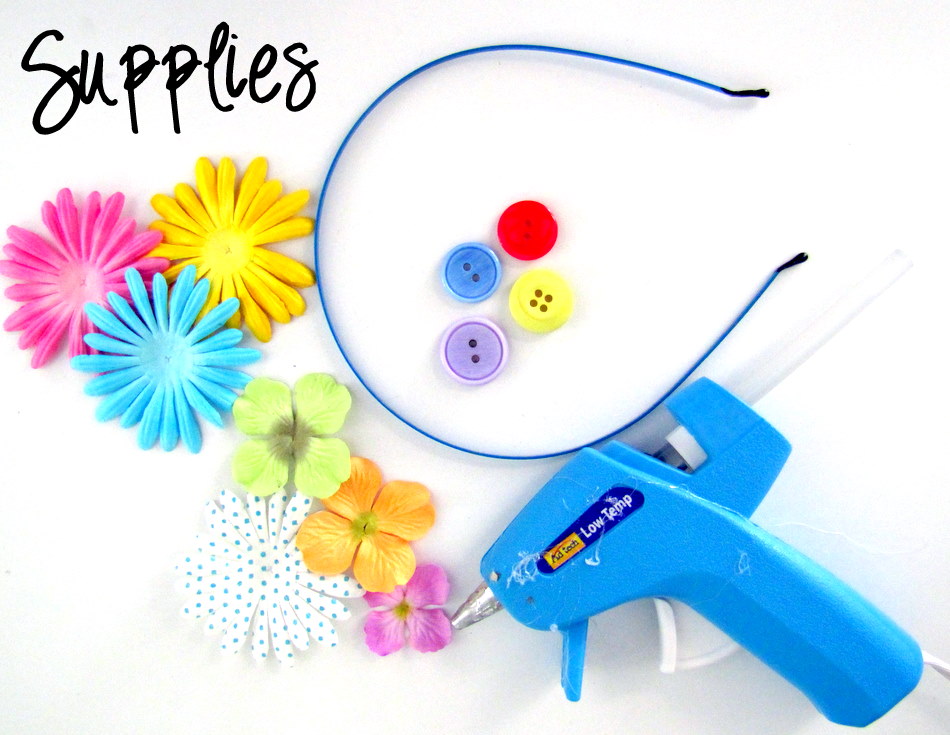
Here’s what you will need:
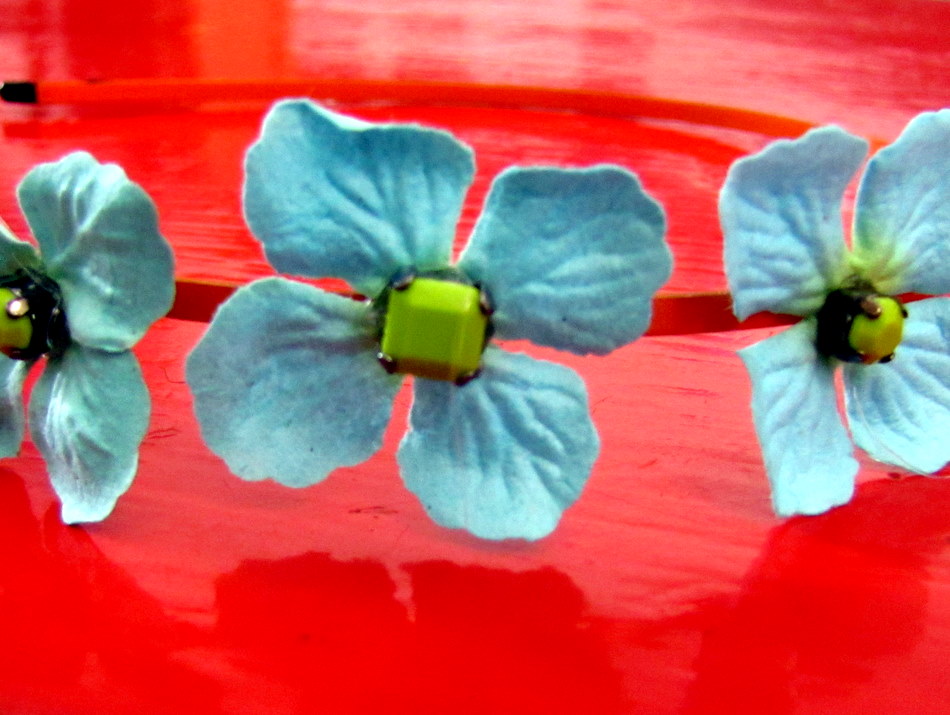
Scrapbooking paper flowers {from Michael’s}
Old headband you haven’t worn in a while {or you can buy a pack of your favorites at Target}
Glue gun and hot glue
A few fun buttons {because I love buttons}
And any extra embellishments you feel inspired to use
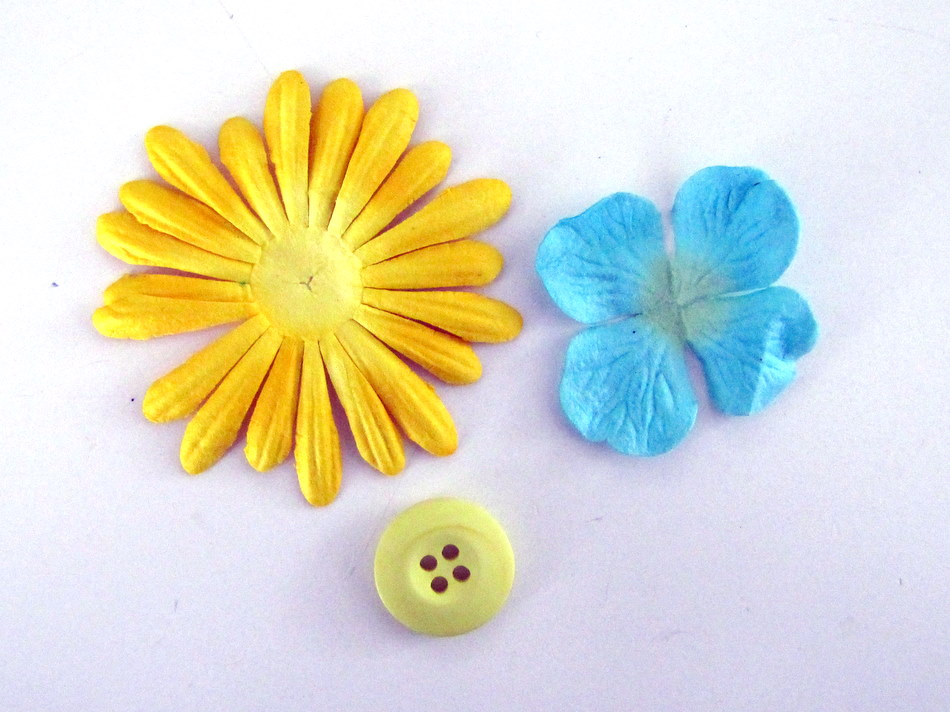
STEP ONE:
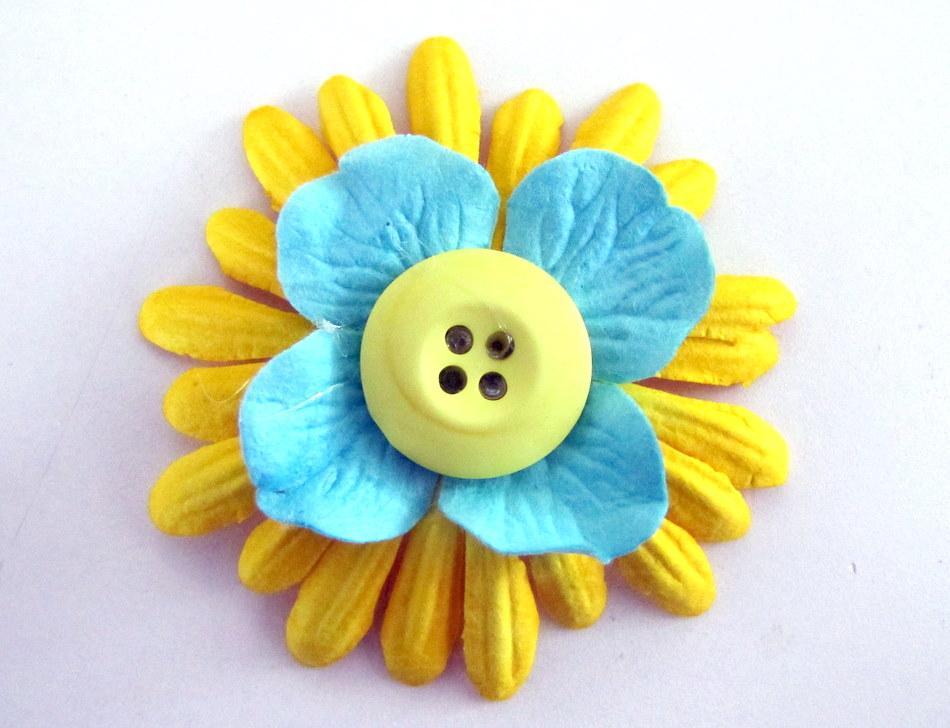
Pick your favorite paper flower combinations and button centerpiece.
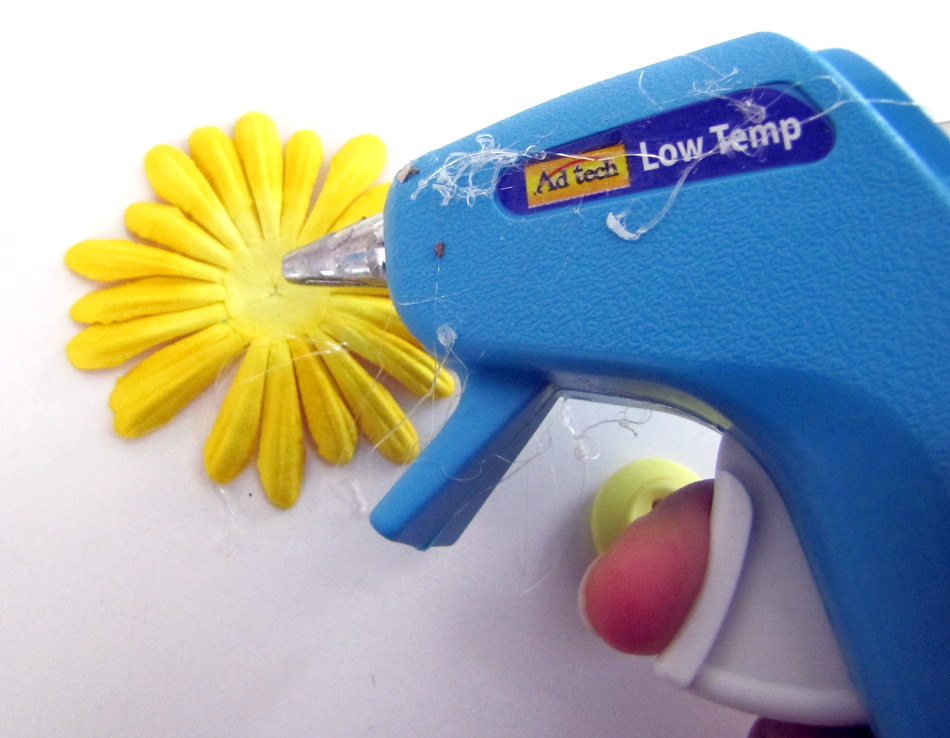
STEP TWO:
Glue and stack your selected flowers.
Glue your button down in the center. It will look something like this:
STEP THREE:
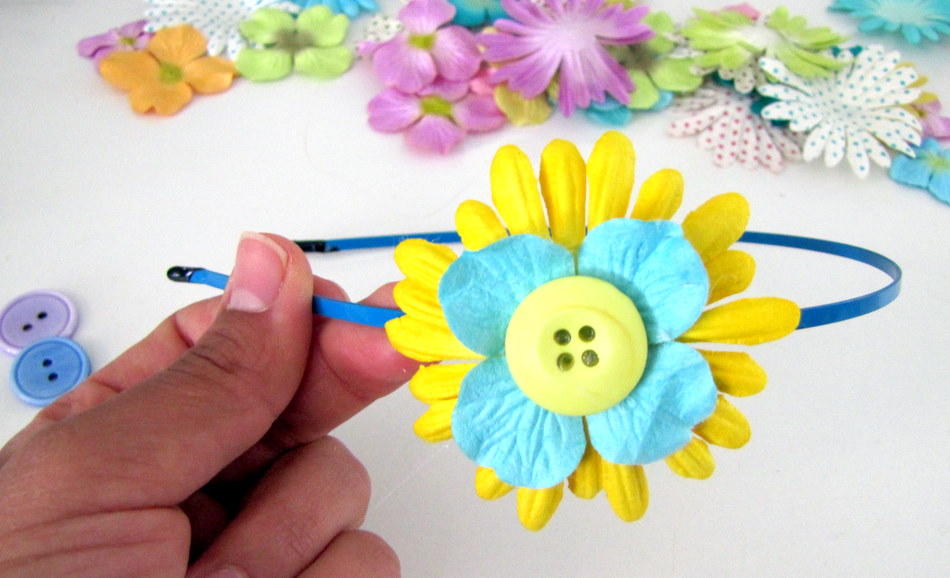
Glue you new pretty flower/button stack directly onto your headband.
Be sure to line up the flower with the headband so that it will be placed in the correct spot on your head.  I like to wear mine off to the side.
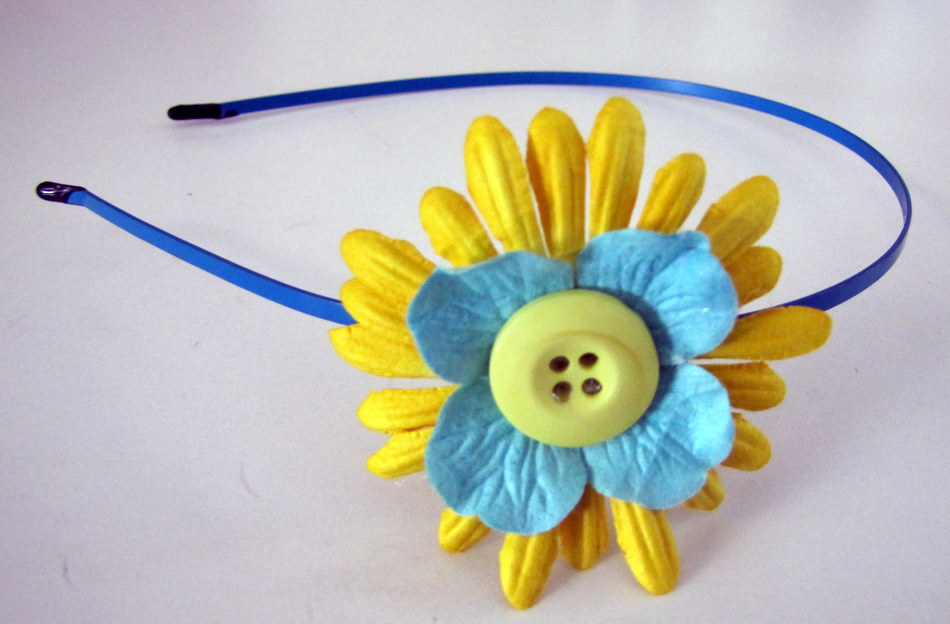
And ta-da, you’re done!
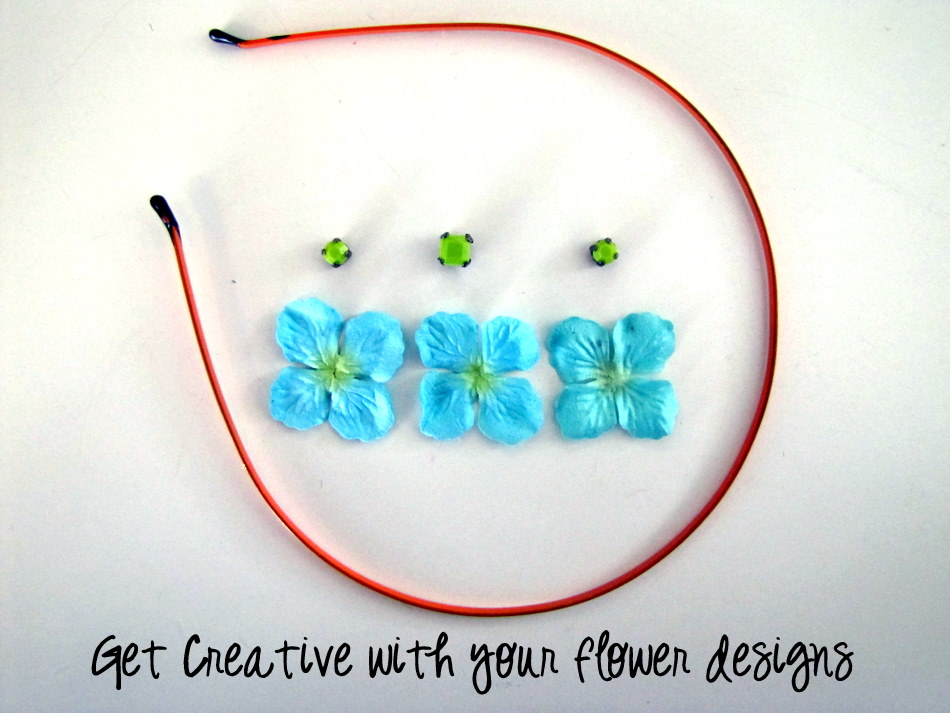
Now get creative with your flower creations:

Happy Crafting!
{Click HERE to check out the awesome parties I link to}
22 Comments
Share
Ashley Stock

I'm Ashley. Sometimes I craft, occasionally I cook, everyday I write, and I'm always Momma. This is my blog. I keep it real while still seeing the rainbows and butterflies in all of life's lessons.

You May Also Like

Quick and Easy Painted Mason Jar Vases

June 10, 2013

Awesome, Sentimental Baby Shower Gift

September 17, 2013

Beach Wood Photo Project

August 13, 2010

Leave a Comment

You must be logged in to post a comment.

Previous Post
Stamped Wall Art and Revamped Frame TUTORIAL
Next Post
Button Headband Tutorial
About Me

About Me

I'm Ashley. Sometimes blogger. Everyday oiler. Cozy homemaker. Milestones. Meltdowns. Life lessons of a momma-in-training.

Join the mailing list

Be the first to know about new posts + all the best deals!


Thank you for subscribing!


Wellness

Life

Make

Lake Arrowhead

Recent Posts

  • Best Books to Read (Depending on Your Mood) Pt. 2

    October 29, 2024
  • I almost cancelled this photoshoot…

    October 13, 2024
  • Favorite Fall Recipes

    October 7, 2024

Shop My Favorites

Follow Along With Me

…
  • Home
  • Wellness
  • Life
  • Make
  • About
  • Contact
  • Amazon
  • SHOP

Copyright 2020 Little Miss Momma Site Powered by Pix & Hue.