• Home
  • About
  • SHOP
    • Oils
    • Amazon
    • Free People
    • Rugs USA
  • Recipes


        • Recipe

        • Appetizers
        • Main Dish
        • Salads
        • Sides
        • Desserts
        • Drinks + Smoothies
        • Recent Posts

          • Best Books to Read (Depending on Your Mood) Pt. 2

            Best Books to Read (Depending on Your Mood) Pt. 2

            October 29, 2024
        • Recent Posts

          • Grandma’s Authentic Tomatillo Salsa Recipe

            Grandma’s Authentic Tomatillo Salsa Recipe

  • Wellness


        • Wellness

        • beauty
        • self care
        • kiddos
        • essential oils
          • DIY Aromatherapy Bath Salts

            DIY Aromatherapy Bath Salts

          • Bloomer Crew Dinner Party

            Bloomer Crew Dinner Party

  • Life


        • Life

        • love
        • grow
        • learn
        • live
        • lake arrowhead
        • Favorites

          • The Weekly Report: Volume 1

            The Weekly Report: Volume 1


          • Our Love Story: Part 13

            Our Love Story: Part 13

  • Make


        • Make

        • celebrate
        • craft
        • nest
        • style
          • Jack-O’-Lantern Stuffed Peppers

            Jack-O’-Lantern Stuffed Peppers

          • Foraging Fresh Flowers + Greens

            Foraging Fresh Flowers + Greens

  • Contact

Little Miss Momma

craft

Stamped Wall Art and Revamped Frame TUTORIAL

May 15, 2010
Stamped Wall Art and Revamped Frame Tutorial
by Little Miss Momma
Featured on Blue Cricket Design


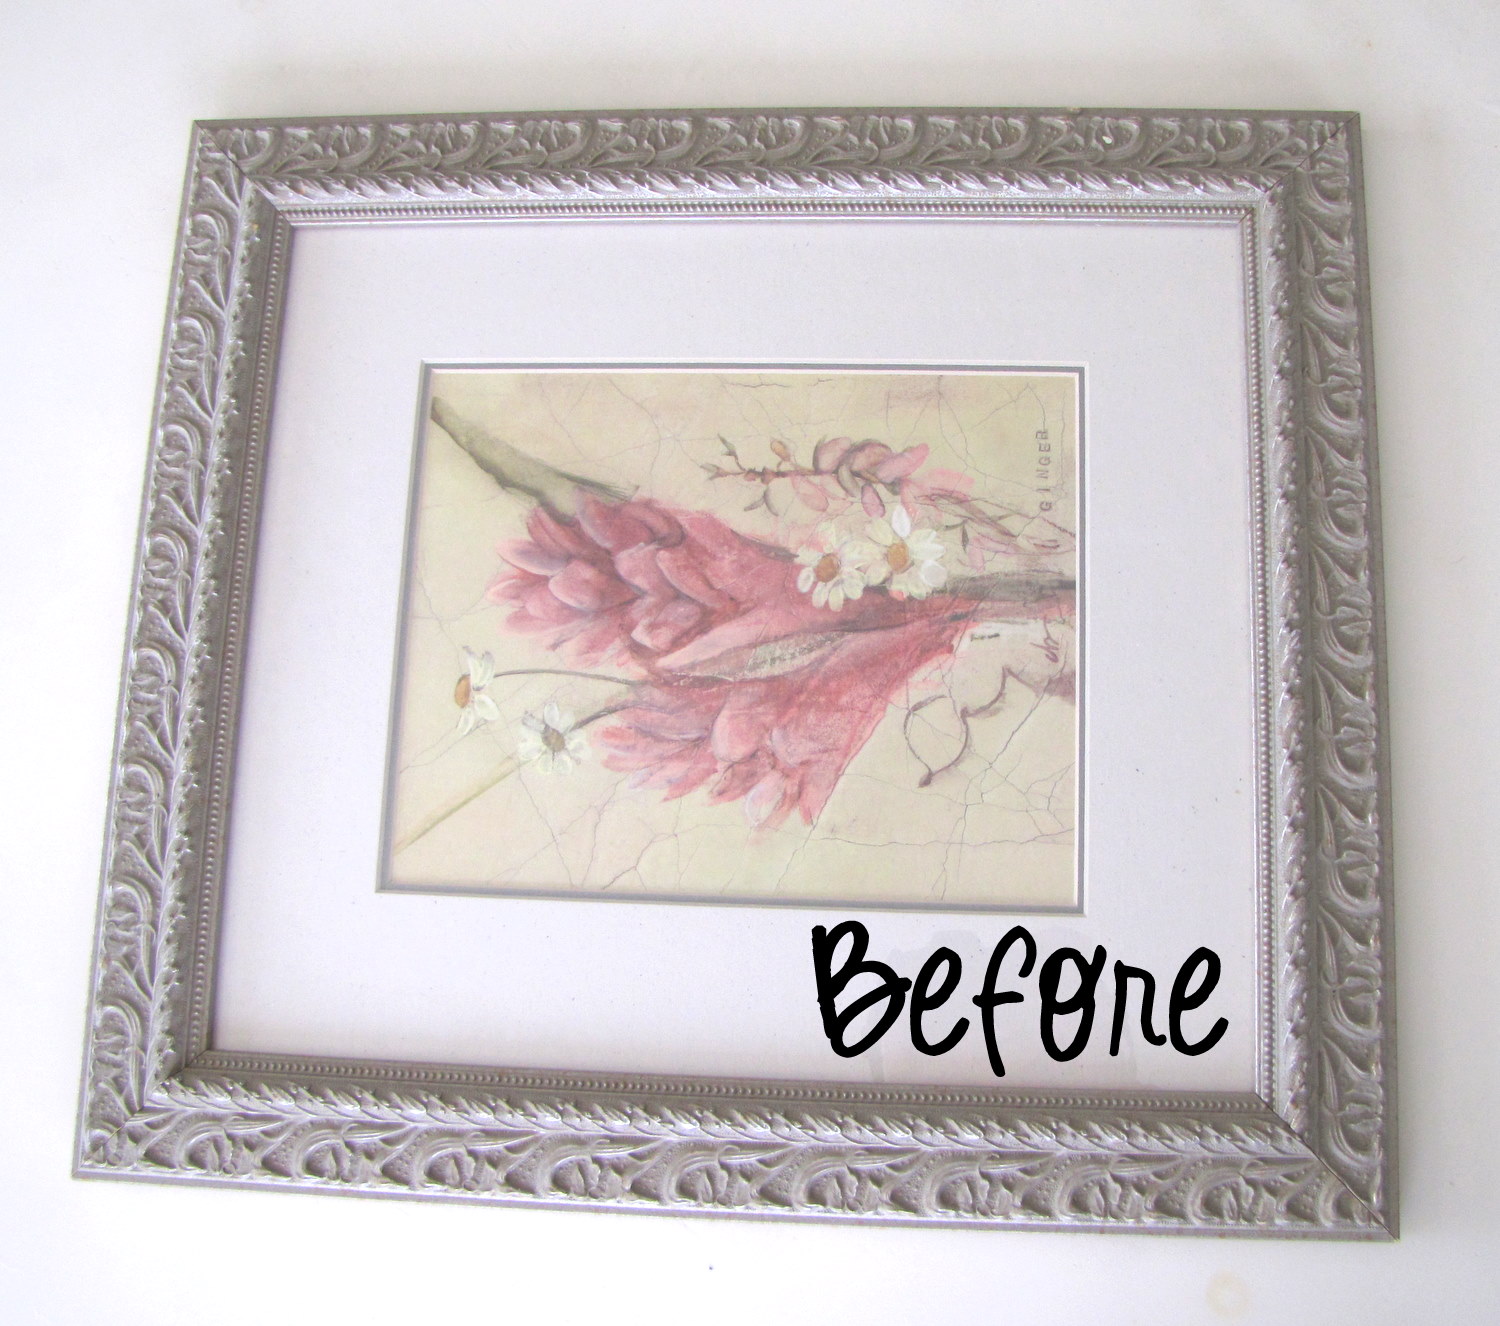
A few weeks back I stumbled across some art work in my attic that just wasn’t my style–but the frame had tons of potential. So I set it aside until I discovered a project that “spoke to me”.  I came up with this idea when I found a set of foam alphabet stamps at Michael’s for 99 cents {yes, you heard me right–99 cents}!

And for those of us who don’t own a glorious Cricut {*sigh*}, stencils and sponges are the next best thing.

So here goes the easy-peasy tutorial:


You will need:

An old frame in need of a revamp
Foam sponge alphabet set {purchased at Michaels}
Black acrylic paint {for lettering}
Spray paint in the color of your choice {for frame}
Paint sponge to apply the paint
Ruler {or cutting mat with ruler lines}

STEP ONE:

Remove the glass from your frame and spray paint the frame in the color of your choice {I used black gloss}. Continue to the next step while you wait for your frame to dry.


{note my toes in desperate need of a pedicure in right corner}

STEP TWO:

 Now, take your glass and line it up on your rulered cutting mat–this is so you keep your letters going in a straight line across the glass.  Pick out the sponge letters you will need to spell out your desired message. 
My message reads: Stock Family Est. 2006
There is only one of each letter in a set which is why you may not be able to lay out the entire message initially {see picture}.


STEP THREE:
Now you are ready to start painting your letters.  Use the sponge paint applicator to apply a small layer of paint to your first letter.  Less is more when using stamps, especially on glass because it does not absorb excess paint like wood does. Also, try not to let the paint get on the sides of the sponge letter in order to avoid a messy and uneven stamp.


Gently place your stamp in the desired location, being sure to stay lined up with your ruler.  Once your stamp is in place, push down with slight firmness to be sure all areas of the stamp have touched the glass. Note: If you mess up on a letter, get a paper towel wet with warm water and wash off the paint before it dries {the paint will wipe right off}.


And stamp away…


STEP FOUR:
Wait for the paint to dry before replacing the glass in you newly revamped picture frame.  Replace the glass and hang in a fabulous location for all your visitors to admire. If you prefer, you can also apply ribbon to hang the frame.


I hung mine in my entry way:


Happy Crafting!
Click HERE to find out about the awesome parties I link up to. These blogs are awesome!
17 Comments
Share
Ashley Stock

I'm Ashley. Sometimes I craft, occasionally I cook, everyday I write, and I'm always Momma. This is my blog. I keep it real while still seeing the rainbows and butterflies in all of life's lessons.

You May Also Like

DIY Boho Yarn Wall Art

June 6, 2015

Beach Wood Photo Project

August 13, 2010

Typography Mantel Art (using lemons)

May 10, 2013
  • Amber
    May 15, 2010

    Super cute!!!!! I love it..infact…I need to do this project. Thanks for sharing!

    Reply
  • FrouFrouBritches
    May 16, 2010

    I love it! I don't have a Cricut either (sigh) so I use paint too.

    Reply
  • Shel at Dreamy Nest
    May 16, 2010

    Very cool! I love it. Adding it to my project to-do list.

    Reply
  • Show Me Mama
    May 16, 2010

    oh, my I totally love it. Job well done. You are indeed crafty, we have something in common. I love to do lots of crafting. Here is what i want to tell you. I am visiting your blog to let you know that I have two wonderful awards for you. You can pick it up here
    http:/showmemama.blogspot.com
    Thanks

    Reply
  • Sue
    May 17, 2010

    Cute idea and it looks so sweet. Nice job!
    🙂 Sue

    Reply
  • Kenzie
    May 17, 2010

    So cute! I love my cricut, I think you need one!

    Reply
  • Melissa
    May 17, 2010

    Oh my goodness. I love this! I love that you did it with stamps. I really want one know. I will have to see if I have a frame that I can use!

    Reply
  • Kaysi
    May 17, 2010

    That is awesome!!

    Reply
  • Rebecca@This Present Life
    May 17, 2010

    I LOVE this idea! This would make a really great wedding or housewarming present! Found you at Skip to My Lou and am now happily following! I'd love it if you could check out my blog when you have the chance (in between changing diapers, picking up toys, laundry, etc…).

    Reply
  • Linda@Coastal Charm
    May 17, 2010

    Lovin' this "COOL" and "THRIFTY" idea!

    Blessings,
    Linda

    Reply
  • Santa's Gift Shoppe and Ideas
    May 18, 2010

    Hi..I’m Barb….I am from Trendy Treehouse Marketing Monday .. I am your newest follower. I hope you will get a chance to visit my blog @ santasgiftshoppe.blogspot.com
    & get inspired by something for your family/home. I hope you will follow me as well. Nice to meet ya new friend!!!

    Reply
  • Meg
    May 18, 2010

    Very cute! I need some stamps, apparently. Great job!

    Reply
  • malia
    May 18, 2010

    great idea and i am sadly not a cricut owner myself– love your project!

    Reply
  • Angela@Secrets of a Super Mommy
    May 21, 2010

    Super cute! Thanks for sharing!

    Reply
  • erica
    March 7, 2012

    hey – this is so cute!! i would love to make one, will have to work with stencils since i don’t have the stamps. question – how did you get the glass back in with nothing behind it? any frames that i have, have some kind of backing that would go behind the picture – did your frame not have that? it appears there is nothing behind the glass on yours, looks like i can see the wall (which i would prefer).

    Reply
  • I SPY: Around the Home - nest - Little Miss Momma
    September 23, 2012

    […] my home–a friendly reminder of my latest neurosis, no shoes inside. {Stamped est. sign tutorial, hook shelf by Old and New Again} I Spy our very first family portraits hanging over our […]

    Reply
  • HERVE LEGER
    April 4, 2020

    can be especially difficult to achieve with a knit because they’re all Herve Leger Bandage Dress going to be formed to the body.

    Reply

Leave a Comment Cancel Comment

Recipe Rating


Previous Post
Vacation with a Monster Baby
Next Post
Paper Flower Spring Headband Tutorial
About Me

About Me

I'm Ashley. Sometimes blogger. Everyday oiler. Cozy homemaker. Milestones. Meltdowns. Life lessons of a momma-in-training.

Join the mailing list

Be the first to know about new posts + all the best deals!


Thank you for subscribing!


Wellness

Life

Make

Lake Arrowhead

Recent Posts

  • Best Books to Read (Depending on Your Mood) Pt. 2

    October 29, 2024
  • I almost cancelled this photoshoot…

    October 13, 2024
  • Favorite Fall Recipes

    October 7, 2024

Shop My Favorites

Follow Along With Me

…
  • Home
  • Wellness
  • Life
  • Make
  • About
  • Contact
  • Amazon
  • SHOP

Copyright 2020 Little Miss Momma Site Powered by Pix & Hue.