• Home
  • About
  • SHOP
    • Oils
    • Amazon
    • Free People
    • Rugs USA
  • Recipes


        • Recipe

        • Appetizers
        • Main Dish
        • Salads
        • Sides
        • Desserts
        • Drinks + Smoothies
        • Recent Posts

          • The Maid by Nita Prose: My Book Review

            The Maid by Nita Prose: My Book Review

            January 17, 2023
        • Recent Posts

          • Grandma’s Authentic Tomatillo Salsa Recipe

            Grandma’s Authentic Tomatillo Salsa Recipe

  • Wellness


        • Wellness

        • beauty
        • self care
        • kiddos
        • essential oils
          • DIY Aromatherapy Bath Salts

            DIY Aromatherapy Bath Salts

          • Bloomer Crew Dinner Party

            Bloomer Crew Dinner Party

  • Life


        • Life

        • love
        • grow
        • learn
        • live
        • lake arrowhead
        • Favorites

          • My Trichotillomania Hair Pulling Story (and resources)

            My Trichotillomania Hair Pulling Story (and resources)


          • Our Love Story: Part 12, Through Ben’s Eyes

            Our Love Story: Part 12, Through Ben’s Eyes

  • Make


        • Make

        • celebrate
        • craft
        • nest
        • style
          • Jack-O’-Lantern Stuffed Peppers

            Jack-O’-Lantern Stuffed Peppers

          • Foraging Fresh Flowers + Greens

            Foraging Fresh Flowers + Greens

  • Contact

Little Miss Momma

learn

10 Steps to Taking Your Camera OFF Auto {Photographer Guest Post}

April 15, 2011
I was introduced to Kellie Larsen Photography a few months ago,
and as I browsed through her website
I remember thinking,
Wow, I want to take photos like this chic.
If only I could get up the nerve to take my camera off auto.

And if you read this post, then you know my picture taking methods are a bit…well, elementary {for lack of a better word}.

So after chatting with Kellie a bit about my
ridiculous fears of the “manual” setting,
she decided to put together this amazing post
to help us all take the plunge.

Seriously, this post is like GOLD! Thank you Kellie!

****************************

10 Steps to Ditching Full-Auto
(and improving your photos)

Do you own a nice,
expensive camera,
yet still shoot in Full-Auto?

If so, you’re possibly feeling overwhelmed by all of the settings and buttons on your camera. Or maybe it is because you don’t see the point in taking your camera off of Auto Mode since your camera must know more than you, right?
Wrong!

I wrote this tutorial in hopes of making you feel empowered. I’m giving you 10 tips to help you to learn to use your DSLR and improve your photography skills. You are smarter than your camera and with some work the quality of your photos will improve greatly!


But before we begin, a little bit about me.
My name is Kellie.

Me

I’m a 26-year-old mother to two beautiful girls.
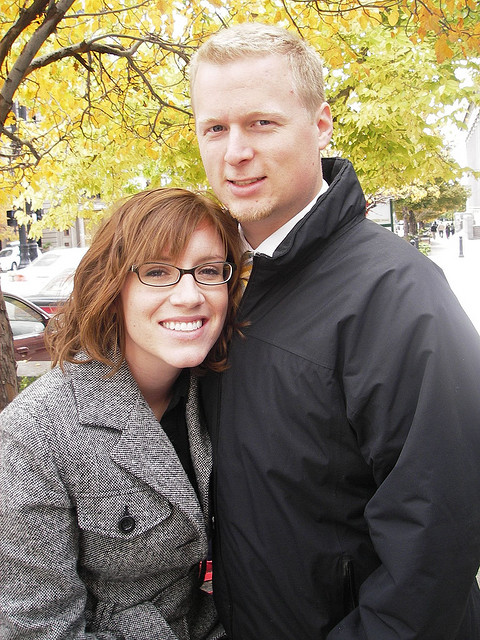
They’re a year apart and so much fun!
I wouldn’t change a thing.

My Girls1

I’m also a wife of 3+ years to one super fun guy
who just so happens to be my best friend and such a good dad!

10.6.2007
(Us. The dating years. Oh man, he’s cute!)
We love to adventure together as a family.
We also love a relaxing day at home.
But mostly we just like to be together.
I am a self-taught photographer by profession. Check out some of my photos HERE. I am currently living in the Los Angeles/Long Beach area. I love what I do and one of my goals before and during a photo session is to get to know my clients so we actually become friends.
You can check out my website.
Follow me on my blog.
And “like” me on FB.
Okay… On to the tutorial!
First of all, please do not feel overwhelmed. Once you begin to put these steps into practice you will get it, your photos WILL look better, and you will feel so proud of yourself. Now go grab your DSLR and try these tips out.

10. JPEG vs RAW
Let’s just keep it simple: If you are just photographing your cute kids then I recommend shooting JPEG. The JPEG files are smaller than RAW and most programs support them. Refer to your instruction manual.
9. ISO
If you are outside in the sun, use a low ISO setting. If you are inside where it’s darker, you will need to raise your ISO. I always like to start low and raise it if my photos are still coming out too dark. The main problem with high ISO is that your photos may look more grainy. The top photo was taken with a low ISO (100) and the bottom with high (1600). You’ll notice there are grainy spots in the shadows of the bottom photo.

ISO1

8. White Balance (WB)
Your camera will give you different options for White Balance. Choose the one that applies to your situation. The appropriate White Balance will give your photos warmth and character.
This photo was taken outside in direct sunlight. For the top photo I set my camera to ‘Daylight’ WB mode. Nice and warm. For the bottom photo I set my camera to ‘White Fluorescent Light’ WB mode. Washed out with too much blue in it.

WB Example

7. Exposure
There are two components to Exposure: Aperture and Shutter Speed. They need to work together to get a good picture.


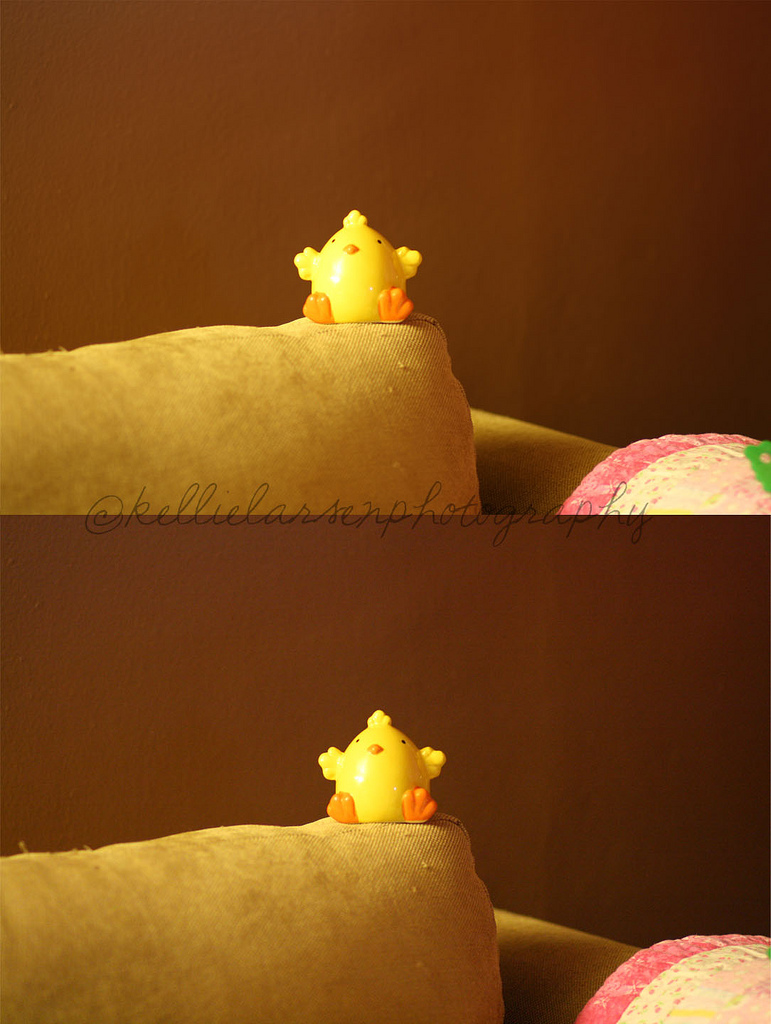
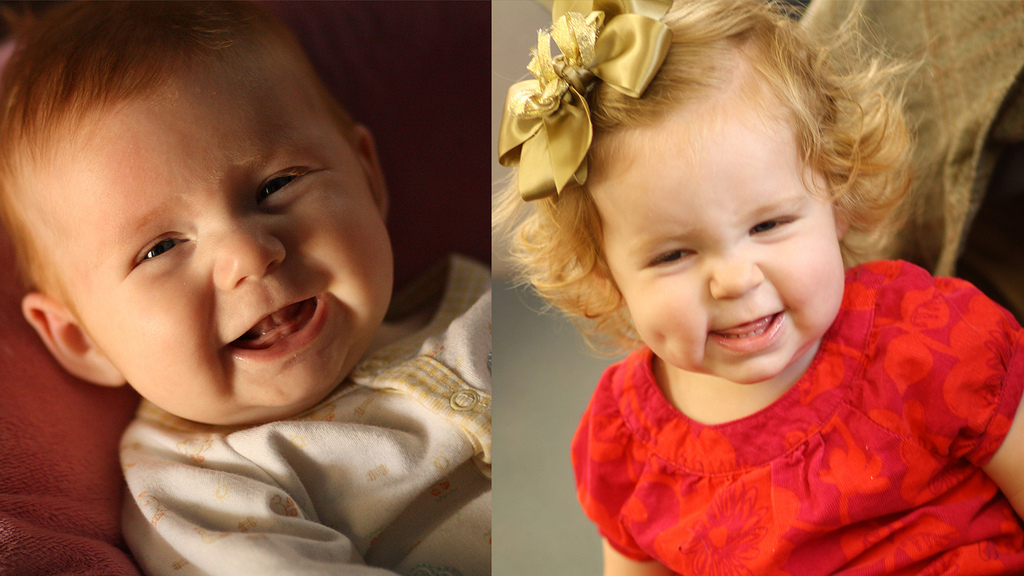
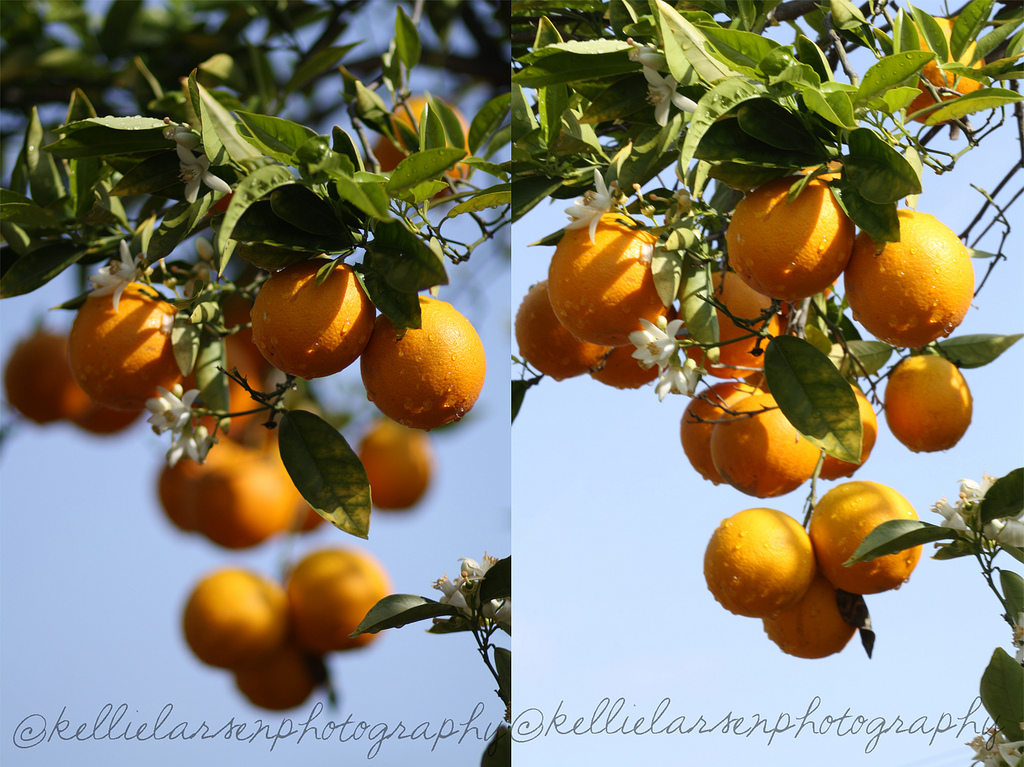
Aperture (Av): Controls the how blurry or clear your background and foreground are. If you want to control the amount of blur-effect then set your camera to Av Mode. The lower your f-number, the more blurry your background and foreground will be. The left photo was taken with a low f-number (F1.8). The right photo was taken with a high f-number (F20).


Aperture Example

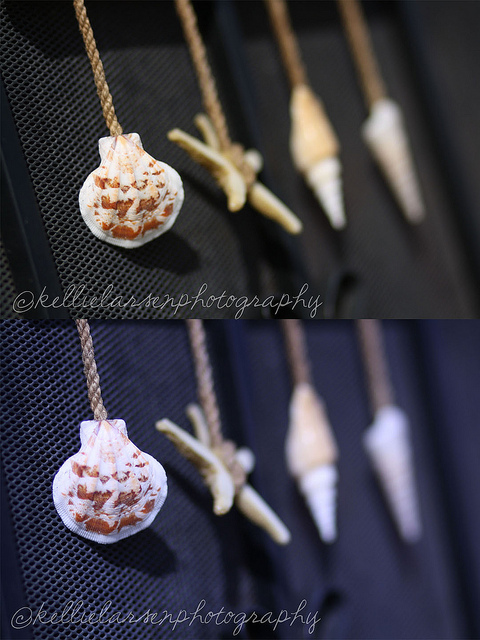
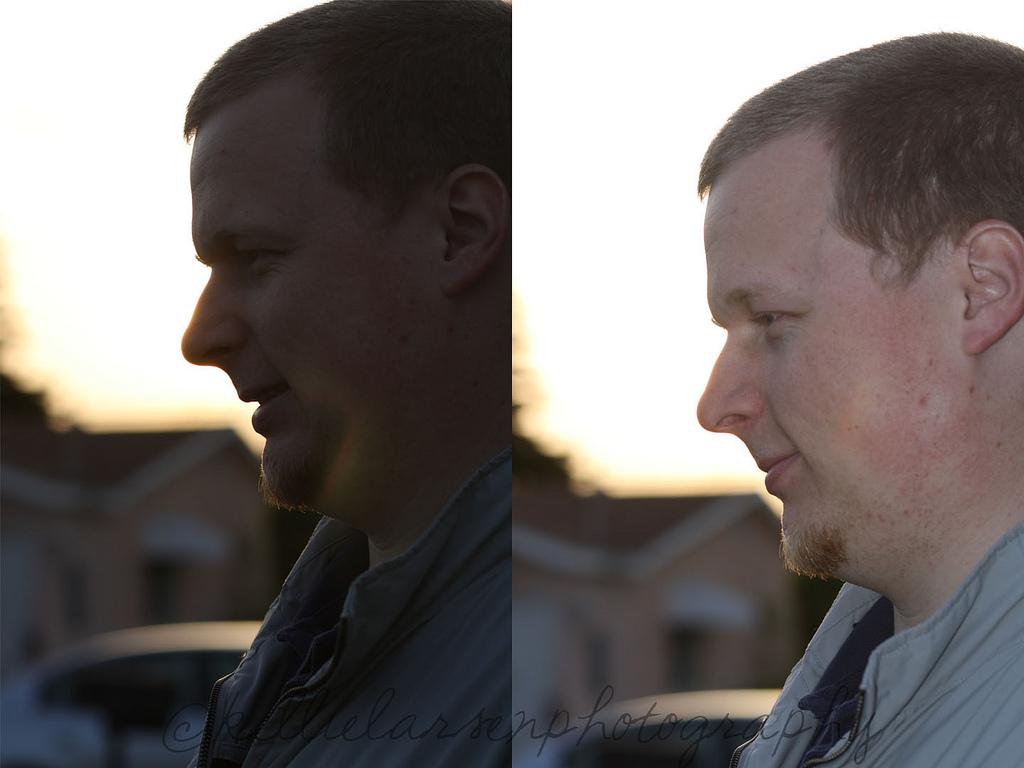
Shutter Speed (Tv): Controls the motion blur of your subject. If you want to control the amount of motion blur then set your camera to Tv Mode. The Shutter Speed is measured in seconds. 1/500 means 1/500th of a second is how long the shutter will be open. Most shutter speeds range from 1/4000 to 30 seconds. The longer your shutter is open, the more motion blur you will get. The left photo was taken with a longer shutter speed (1/25). The right photo was taken with a shorter shutter speed (1/3200). You might need a tripod for longer shutter speeds to avoid unwanted blur due to camera shake. Also, if your photos come out too exposed (too bright) then shorten your shutter speed.

Shutter Speed

Manual Mode (M): Play with it if you want but I stick with Av and Tv most of the time.


6. Focus
In Auto mode your camera will focus on the closest subject. Because you may not always want this you can change your camera’s Auto Focus Mode to focus where you want. Refer to your instruction manual under Focusing\AF-mode. Follow the instructions to have it focus on the center square. Now you can look through your viewfinder and choose what you want to focus on.

Place the center square over your subject, press and hold the shutter button halfway (the button you use to take the picture), then press the button the rest of the way. As long as the shutter is held halfway the focus will stay the same.

Take this orange tree for example. I wanted the orange to be in the left corner of my frame. But if I were to just take the photo like that, the center area would be the back bushes.
Focus Example1

So in order to get my orange in focus, I put the orange in the center of my viewfinder, held the shutter button half way down, then moved my camera so the orange was where I wanted it, and then pushed the shutter button the rest of the way down. This was my result:
Focus Example2

5. Flash
The best philosophy when it comes to the flash is: use it when you have to, avoid it when you can. Your photos will look so much better in natural light. Sometimes the flash can be your friend but, for the most part, a flash creates unflattering and unnatural shadows. If you are in a low-light situation, first try lowering your f-stop or increasing your shutter speed OR bumping up your ISO. If you need to use your flash then use it, but only as a last resort.
Here is an example of how a flash can create unwanted contrast. The flash created a reflection and a shadow that is avoidable.

Flash

If you take a picture and it comes out too dark because the subject is back-lit, using your flash as a Fill-Flash is a good idea.

Flash Example

I have an external flash that I sometimes bounce off the ceiling when indoors. This helps to illuminate the subject without giving the shadows of a direct flash to the face.

4. Shade

Shade is your friend when photographing people. Most people look outside on an overcast day and think, “Well, there goes my photo shoot! There’s no sun in sight!” Not true. The sun often creates shadows and makes people squint, so an overcast day is great! Want to get some great shots of your baby? Sit them in a shady spot under a tree. The sun is great for some shots too, but one thing to be sure of is to avoid partial shade/partial sun. Your photos will turn out looking blotchy otherwise like in the photo below.
Shade
3. Framing Your Subject
Imagine there is a grid when you look through your viewfinder. Instead of always having your subject in the center square, consider centering your subject on one of the red marks. This is called The Rule of Thirds.
Rule Of Thirds

It makes your photo more visually appealing. Also, if there are horizontal or vertical lines, try to place them on the corresponding horizontal or vertical lines in this grid.

2. PRACTICE
Take your camera with you everywhere you go! Make it a point to take it out and use it in many different settings to get the experience. If you need some incentive to using it, get a cute strap to make your camera seem like an accessory!

1. HIRE ME
Hire me because, not only are my prices incredibly affordable, but because (if you are anything like me) I bet you are hardly in any of your photos. When is the last time you took a family photo that you love? Make it happen and send me an email for session information. Contact me HERE. I’d love to meet you!
36 Comments
Share
Ashley Stock

I'm Ashley. Sometimes I craft, occasionally I cook, everyday I write, and I'm always Momma. This is my blog. I keep it real while still seeing the rainbows and butterflies in all of life's lessons.

You May Also Like

Barn Owl Primitives: Tips to Grow Your Creative Business

August 30, 2011

Blog Tips Part Two: The techy behind the scenes stuff

September 29, 2010

How to Get Kids to Smile For Pictures: Photography Tips

June 3, 2011
  • Girl of The Grove
    April 15, 2011

    THANK YOU for this post! I can't wait to take my dslr outside this weekend to play around. : )

    Reply
  • LuLu
    April 15, 2011

    Love this post! I am taking a photography class right now and this was a great recap of all the biggest things about photography that I WISH I had known a long time ago when I got my nice camera!

    Thanks for the post and the tutorial!

    A Candid Life

    Reply
  • Jen
    April 15, 2011

    Thanks you so much for this post. I am getting my first dslr camera today for my birthday and these tips will make me look like I know what I'm doing a lot faster:)

    Reply
  • LifeCreatively
    April 15, 2011

    This is great information! I'm so excited to practice. 🙂

    Reply
  • LuLu
    April 15, 2011

    I am posting about this on my blog today since I found it so helpful!

    Feel free to stop by!

    A Candid Life

    Reply
  • Andrea
    April 15, 2011

    Thank you! What a great post -such great info. You're great!

    pics-o-andrea

    Reply
  • Chrissy @ Boerman Ramblings
    April 15, 2011

    that was awesome thanks so much for sharing!

    Reply
  • Kara
    April 15, 2011

    Super duper post. Thanks so much. I can't wait to start fiddling and practicing.

    Reply
  • The Other Mary
    April 15, 2011

    Now I want a new camera! Still, some of these settings are adjustable even on my Sony Cybershot! Thanks!

    Reply
  • I BLEED PINK
    April 15, 2011

    I have my "big girl" camera for almost 2 years and never had the nerve to shoot it outside of auto. I am going to save these instructions and get brave!

    Reply
  • Shelley
    April 15, 2011

    Thank you, thank you, thank you!!! These are such great tips! Now I just need it to stop raining so I can go outside and practice 😀

    Reply
  • Kelsey
    April 15, 2011

    Thank you so much! I got a Canon Rebel a few months ago and have been too scared to take it off of auto. I can't wait to try some new things!!! Maybe in the future Kellie can explain what each lens size can do or means!!! 🙂

    Reply
  • Valerie {Next to Heaven}
    April 15, 2011

    GREAT post!

    Reply
  • Gallamore West
    April 15, 2011

    I love this! Fabulous tips given in easy to understand directions! I've been NEEDING this!

    Reply
  • Hilary Mae
    April 15, 2011

    I don't think you understand HOW MUCH I needed this! Thank you thank you thank you!!!

    Hilary
    theyoungandthenaive.blogspot.com

    Reply
  • Lindsey @ Inspiring Creations
    April 15, 2011

    I ditched auto a few months ago when I finally learned how to use my camera! I can't believe the difference in my photos! Thanks for the awesome tips! 🙂

    Reply
  • Hayley
    April 15, 2011

    This is great post. I'd like to add that after getting used to the Av and Tv modes, it is a great idea to use the manual setting. I shoot every picture manually (even when it is terribly inconvenient) and only learned because I FORCED myself to shoot that way. Now I wouldn't have it any other way!

    Reply
  • Kara Rush
    April 15, 2011

    Great Post Kellie!! You are the bomb 🙂

    Reply
  • PeaceLoveApplesauce
    April 15, 2011

    Thanks so much for the awesome tips!!

    Reply
  • Heather Mullin
    April 15, 2011

    Love this post even though I am a photographer. We can always use some refreshing! LOVE IT!!!!

    Heather

    Reply
  • kBr
    April 16, 2011

    this was INCREDIBLE…thank you for posting it!

    Reply
  • Katie
    April 16, 2011

    Thank you so much for sharing!!!!! I really needed this!

    Reply
  • Meredith Carlile
    April 16, 2011

    Thanks for sharing, this really helps me understand my DSLR better. For a long time I was too focused on shooting with my film SLR and I didn't expect there to be such a difference when I transitioned over to digital.
    One thing I'd like you to know Kellie, it's called an f-stop not an f-number 🙂

    Reply
  • photos by moe
    April 16, 2011

    Kellie,
    I just wanted to thank you for this information! I am only 17, but I love taking pictures, I have been so "scared" of my camera! The pictures I have been taking are not bad, but I think they will now be better! Thank you so much for putting all the technological terms into laymans terms! Thanks again! Check out my photography at http://www.facebook.com/PhotosByMoe and leave me some advice 😉

    Reply
  • Kellie
    April 16, 2011

    Thank you all for your nice comments & for visiting my blog/fb page! I'm so glad his helped so many of you! And don't worry Meredith, I know it's called an F-stop, but to make it clear to the readers I said # so there was no confusion. You all are the best!

    Reply
  • Lindsay
    April 17, 2011

    Great Great Tutorial!! Soo helpful! Thank you!! I have an awesome new camera and am so scared of the Manual setting haha!..but I am going to take your expert advice and try these techniques out.

    Delighted momma

    Reply
  • Lauren
    April 21, 2011

    It's important to note that aperture and shutter speed alone do not determine exposure. It's a triangle and also includes ISO. This is very important to understand when trying to learn how to shoot in manual.

    Reply
  • becky v
    April 25, 2011

    So helpful! I'm using these tips already. The writer
    made it so simple!

    Reply
  • Emily
    January 17, 2012

    Thank you! I’m figuring out how to use my recently purchased a DSLR. I’ve always shot in TV or AV mode but I didn’t exactly understand what I was doing when I changed the numbers on my screen. After I read this, I tried it out a bit and my pictures already improved!

    Reply
  • 5figureday|5figure|Day|Figure|5figuredaywebsite|r proven "traffic forwarding" technology |Hungry leads|
    October 24, 2013

    Incredible, remarkable blog format! Just how prolonged will you be blog to get? you make writing a blog glimpse straightforward. The whole seem of this website is wonderful, along with the articles!

    Reply
  • store builder
    September 7, 2014

    Cool

    Reply
  • TOMS Alpa Boot (Women)
    December 4, 2014

    Also, it is really ideal to fit sneakers through the latter part of the
    day simply just for the reason that the ft have a tendency of
    enlarging a little bit during the total day.
    Remember that you need to know a few things about hiking
    boots so you’ll know exactly what you’re looking for.
    Many famous stars also like to match jeans with UGG boots, and the key of wearing these
    UGG boots and jeans is to tuck the tube of the trousers into
    the UGG boots.

    Reply
  • Unite Hair Product Reviews Blog
    April 10, 2017

    Ten Steps To Better Dslr Photography

    […] en, the more motion blur you will get. The left photo was taken with a longer sh […]

    Reply
  • Product Blog
    July 8, 2017

    Ten Steps To Better Dslr Photography

    […] blur then set your camera to Tv Mode. The Shutter Speed is measured in seconds. […]

    Reply
  • majece majece
    September 13, 2019

    Information from https://paper-writer.org/blog/how-to-write-methods-section-of-research-paper will help you to get info about methods section of a research paper. I had such experience recently

    Reply
  • HERVE LEGER
    March 30, 2020

    As a signature French fashion brand, Black Bandage Dress has proven its worth in the fashion industry for catering nothing but high quality line of bandage dress.

    Reply

Leave a Comment Cancel Comment

Recipe Rating


Previous Post
Let’s Go Antiquing, MmmKay
Next Post
Mommy Advice That Makes Me Want to Scream
About Me

About Me

I'm Ashley. Sometimes blogger. Everyday oiler. Cozy homemaker. Milestones. Meltdowns. Life lessons of a momma-in-training.

Join the mailing list

Be the first to know about new posts + all the best deals!


Thank you for subscribing!


Instagram

…

Wellness

Life

Make

Lake Arrowhead

Recent Posts

  • The Maid by Nita Prose: My Book Review

    January 17, 2023
  • Lessons In Chemistry: My Book Review (no spoilers)

    January 10, 2023
  • Black Friday Sales and Discount Codes

    November 26, 2022

Shop My Favorites

Follow Along With Me

…
  • Home
  • Wellness
  • Life
  • Make
  • About
  • Contact
  • Amazon
  • SHOP

Copyright 2020 Little Miss Momma Site Powered by Pix & Hue.