


T-Shirt Flower Headband Tutorial
One of my besties, Nina at Momma Go Round, came over for a craft day this week, and we went a little craft crazy while our boys destroyed my house, wiped chewed up gold fish on my cupboards and carpet, and danced to Elmo on Sesame Street all day.

{Nina the crafting goddess juggling our boys}
Well Nina recently started this new Momma/Craft blog that I am already in love with, and she came over to my house to work on her exciting project for next week…
Next week is T-Shirt Tutorial Week at Momma Go Round–with a series of fabulous t-shirt tutorials throughout the week, culminating in a super dooper t-shirt link party at the end of the week.
Exciting, right!
Well, in the midst of t-shirt crafting madness, Nina squeezed in some time to teach me how to make these adorable t-shirt flowers that I attached to a stretchy headband…and NOW we are teaching you too!
Isn’t this the cutest?!

Here’s what you’ll need:

Supplies:
stretchy headbands from Target
old t-shirt to cut up
thread in same color as shirt
needle
scissors
embellishments of your choice {i.e. buttons, beads}
STEP ONE:

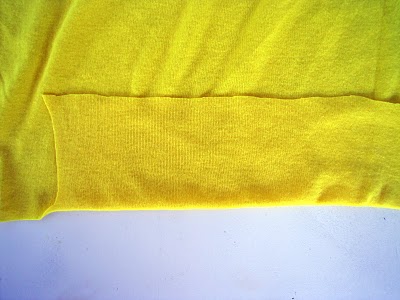
Prepare to cut your shirt to use the material.

Cut out a small rectangle shape.

Fold the piece in half length wise.

STEP TWO:
Now cut your folded rectangle into the shape of a B.

Cut out as many flowers as you want to put on your head band.
You will use two of these cut-outs per flower.
So if you want 3 flowers, you will need 6 cut-outs.
I used three flowers {6 cutouts} in all different sizes.

{The two cutouts on the left are still folded in half. The other two are opened up.}
STEP THREE:
Once you have all your cut-outs prepare to make your flowers. Grab two pieces that are the same size and stack them on top of each other. Below are 4 pictures of 4 different ways you can stack your flower petal cut-outs. Stacking different ways will give each flower a unique look.

Now take your stacked flowers and run a stitch through the middle.

Scrunch up the middle of the flower so that it bunches in the middle.

Bunch it by pulling the center thread and using your fingers.

Now pinch the middle of the fabric so that it is in the shape of a flower.


Turn your flower upside down and begin to back stitch through the bunched up portion of the flower.

Continue to sew back and forth through the flower until the fabric keeps a flowery shape.


Flip your flower back over and position your flowers to look like so:

Don’t stress too much about the flowers being perfect–the imperfections make them look more whimsical.
STEP FOUR:
Now, pick the embellishments you want to sew into the middle of your flower.

Then stitch your bead/button directly through the center of your flower and then directly through the headband. See below pictures.


Continue to sew on the other flowers.
The underside of the headband should look like this:

And that’s it!
Too cute, too simple, perfect summer project!

Happy Crafting!
Love,
Little Miss Momma and Momma Go Round
_______________________________________________________________
Oh yeah, don’t you need some new art for your walls?
I thought so.
Visit our latest giveaway to WIN!
Carmella
I just found your blog and I am loving everything here! I just made a t-shirt flower pony-tail holder (light blue with dark brown wooden bead for center) and it turned out great! Thanks for sharing and I can't wait to try more of your projects!
wholesale air max
The label is well known for its LV monogram, which is featured on most products, ranging from luxury trunks and leather goods to ready-to-wear, shoes, watches, jewellery, accessories, sunglasses, and books.
Cheap Louis Vuitton handbag
louis vuitton Malletier — commonly referred to as louis vuitton or shortened to LV —is a French fashion house founded in 1854.
Louis Vuitton Handbags
quick and fast delivery……love it
T-Shirts Online
Wow these are so cute, where did you get the idea from?
Valeria
I used to be recommended this website by means of my cousin.
I’m no longer positive whether or not this post is written by him as nobody else know such unique approximately my problem. You are incredible! Thank you!
Related Site
Thanks meant for delivering this kind of great write-up.
Formal Apparel
Hi, this weekend is nice designed for me, since this time
i am reading this wonderful educational article here at my home.
HERVE LEGER
“I love the idea of movement, but this White Bandage Dress can be especially difficult to achieve with a knit because they’re all
kamar jaman dulu
It’s very effortless to find out any matter on web as compared
to textbooks, as I found this post at this web page.
agar kayu tidak dimakan rayap
My family all the time say that I am wasting my time
here at net, however I know I am getting knowledge daily by
reading such fastidious posts.
pusat mebel jepara
Hi there would you mind sharing which blog platform you’re using?
I’m planning to start my own blog in the near future but I’m having a hard time choosing between BlogEngine/Wordpress/B2evolution and Drupal.
The reason I ask is because your layout seems different then most blogs
and I’m looking for something completely unique.
P.S Apologies for being off-topic but I had to ask!