


Meet Maria–she’s the sweetest!
And today she is guest posting a fabulously adorable project that makes me wish I had a little girl to test out all the frilly crafty ideas I have swirling around in my head. And here’s Maria:
And today she is guest posting a fabulously adorable project that makes me wish I had a little girl to test out all the frilly crafty ideas I have swirling around in my head. And here’s Maria:
********************************************************************
Hello everyone! I can not express just how excited I am to be here guest blogging on Little Miss Momma!! If you know me at all you know that Ashley is one of my big bloggy crushes! haha, But who doesnt have a crush on her, right!? She is a huge inspiration to me as a woman and a Momma. And even though I don’t know her in real life I feel connected with her through her wonderful heartfelt posts, which have made me laugh, think, create, relate and on occasion brought me to tears!
Well enough of my gushing! I guess I should introduce myself. My name is Maria-Isabel and I blog over at Agape Love Designs. I am a 27 year old Christian wife to my best friend and blessed momma to 3 little cuties! My blog really shows off my love for all things artsy and crafty including photography, free printables, crafty tutorials, hair accessories, jewelry and so much more! Today I have a fun tutorial to share with you about how you can refashion a plain white t-shirt into a fashionable custom interchangeable over shirt!

I made this shirt for my little beauty, Kiah, but I also have one too!
Its great for girls of all ages!
Its great for girls of all ages!
Here are the Supplies needed:
~Plain White Shirt
~ Stencil of Choice
~ Black Lace
~ Colored Chalk
~ Scissors
~ Liquid Stitch

To get started lay your shirt down flat and arrange your stencil in the middle, or any place on the front of your shirt! Then use your colored chalk to color the stencil in.

I used chalk because it can easily be wiped/washed off. Marker or pen will stain.
Here is what it looked like after I took away the stencil.

Next take your scissors and start cutting out your stencil design!
This part can be kind of tedious, it takes some time, you must be careful not to cut the wrong parts.

Once its all cut out, flip it inside out and put a piece of cardboard or some sort of barrier between the front of the shirt and the back of the shirt. We are going to use the liquid stitch and we dont want to glue the front to the back! 🙂

Next you will need to cut out a piece of black lace big enough to cover your stencil.
I just used the actual stencil as a guideline on how big to cut it.
I just used the actual stencil as a guideline on how big to cut it.

After that grab your liquid stitch and start outlining all of the edges of your cutout with it.

Once you have outlined ALL of the stencil lines place the lace carefully over it. Make sure your t-shirt fabric stays flat as you put the lace over it… it tends to want to curl up! So just place the lace over it slowly, pressing firmly as you go.

Once the stencil design is fully covered, you can add a little glue to the edges of the lace to keep it secure in place on the shirt.

You can see in the picture below I lifted the shirt to see the front of it to make sure all the fabric was lined correctly and in place just right. If there are any mess ups.. just slide your hand in a fix them. If it looks just right, let the shirt down and let it dry for 24 hours before washing!

I waited about 25 minutes before I flipped the shirt right side out to check it out!
This is what it should look like from the front!

Now here is the fun part about this new shirt refashion…

Its interchangeable!!
It depends on what color shirt or tank you wear underneath it!

Wear a different color cami underneath it each time you wear it for a new look. 🙂

So fun right! 🙂 If you liked this tutorial, let me know what you think.
And if you make one yourself, I would LOVE to see YOUR version of it. 🙂
And if you make one yourself, I would LOVE to see YOUR version of it. 🙂
Email me a picture or link or even share a photo on my Facebook wall. 🙂
I do hope you all enjoyed my tutorial, and I hope you wont be a stranger, come by my place and say Hey!
I love to meet new people. ♥
I love to meet new people. ♥
Thank you SO much Ashley, for having me over, you are THEE Best!!
Much Love & Hugs,

*****************************************************************************
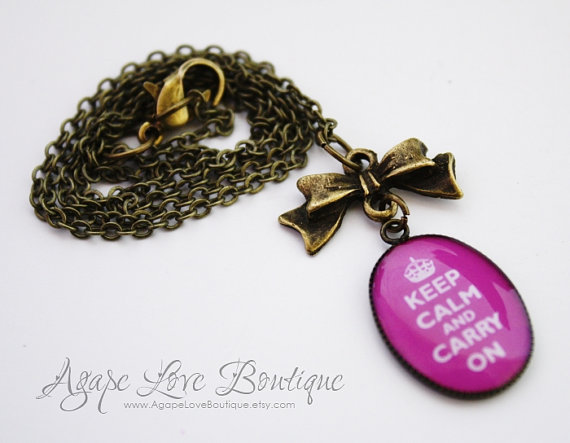
Be sure to check out Maria’s shop too!
It is adorable, and I have been eyeing this super fab necklace for a while now:
It is adorable, and I have been eyeing this super fab necklace for a while now:
Summer @ Made By Munchie's Mama
Such a cute idea Maria! I wonder if you could use a plain mesh and use a more “manly” stencil to use for your little one Ashley…like a football or something and then just put a colored square behind the mesh. Anyways, great post as always!
Ashley @ Little Miss Momma
Summer @ Made By Munchie’s Mamagood idea summer!
Nina@MommaGoRound
What a great idea Maria!!! Love that it’s interchangeable. Super cute 🙂
Christy
This is cute. I will have to try it out for my little. Thanks for sharing the tute. Im your newest follower!
Christy
Jamie
Awesome! I’m sure us with boys can use a superhero stencil or something to create an awesome shirt! 🙂 Thanks Maria!
Jamie
Cute idea!
Chrissy Boerman
thanks for sharing maria and ashley.. great ideas…
Cammie
Awesome idea. I’ve been looking at some ways to make my lil miss’ fall/winter wardrobe and this would be adorable! Thanks so much for sharing. 🙂
jackie
such a cute, easy idea. thanks 🙂
ana {bluebirdkisses}
Super cute idea! I love it
Mandy
Super cute! Seems easy enough for us non-creative types 🙂
Amy Bateman
Such a cute idea. My girls would love this! I’m thinking it would be fun to make holiday designs. The possibilities are endless! 🙂
tarah
super cute!! i have a little girl on the way…due around Christmas…and cannot wait to make cute stuff like this for her!
http://livelaughandlovealwaysss.blogspot.com/
Kadie
How cute is that?!
Meagan
This makes me want to have a little girl to dress up! What cute little outfits!
KeeKeeAllNatural
WOW! This was an amazing project. I am going to try this when I meet with my Tweens (my social club for girls 10-14). I think they would love to do a project like this. Thanks for sharing.
Bella
Totally awesome mama. I love the way you can change the colors because its lace, BRILLIANT.
So exciting being on LMM today, woo hoo, I am super happy for you, and thanks Ashley for supporting my dear friend 🙂
Hugs, Bella 🙂
Bella Before and After – WIWW post
Euro Style Cakes.
Amanda @ little b
LOVE Maria and her blog{s}. What a fun tutorial 🙂
jane denny
Shucks–I’m going to make ME one of these–and I’m a 62 year old grandma!!
Anna @ The Guiltless Life
I used to LOVE doing things like this when I was a little girl! Of course, as that was in the early 90s that meant tie dye rather than cute floral patterns but you know…it was cool at the time!!
Jennifer
Just wanted to give you a tip. My aunt loves sewing and she uses an invisible fabric marker when she stenciling her cutouts. It’s usually purple and stays that way until you wash it. This way you wouldn’t have chalk dust all over your lovely hands. Check out your local craft stores. Just a thought 🙂
Just Jaime
Looks awesome! I’m intimidated by the cutting though!
Jamie
That really is a great idea for a t-shirt refashion! Love it.
Debbie
Thank you so much for such a great tutorial! I have been looking so very long for something like this and finally found yours 🙂 btw a Very beautiful daughter you have! She is sooo very adorable!
high quality custom design logos
Thanks for finally writing about >DIY T-Shirt Refashjon – craft – Little Miss Momma <Loved it!
HERVE LEGER
“I love the idea of movement, but this White Bandage Dress can be especially difficult to achieve with a knit because they’re all
zmgen
clomiphene pill buy cheap clomid tablets where to get cheap clomiphene how can i get cheap clomiphene without prescription can i buy generic clomid pill clomid prices in south africa can i buy cheap clomid tablets